
How to perform the Tuning of a Linux Box

# Kernel sysctl configuration file for Red Hat Linux.

# For binary values, 0 is disabled, 1 is enabled. See sysctl(8) for
# more details.

# Controls IP packet forwarding.
net.ipv4.ip_forward = 0

# Controls source route verification.
net.ipv4.conf.default.rp_fliter = 1

kernel.sysrq = 1

kernel.core_uses_pid = 1

#net.ipv4.tcp_ecn = 0

kernel.grsecurity.fifo_restrictions = 1
kernel.grsecurity.linking_restrictions = 1

# Audit some operations.
kernel.grsecurity.audit_mount=1
kernel.grsecurity.signal_logging=1
#kernel.grsecurity.suid_logging=1
kernel.grsecurity.timechange_logging=l
kernel.grsecurity.forkfail_logging=1
kernel.grsecurity.coredump = 1

# Lock all security options.
#kernel.grsecurity.grsec_lock = 1
cat /proc/sys/net/ipv4/tcp_ecn
sysctl -w paramater_name = new_value
sysctl parameter_name
sysctl net.ipv4.tcp_ecn
- net.ipv4.icmp_echo_ignore_broadcasts — When this parameter is enabled, the system ignores broadcast ICMP echo packets.
- net.ipv4.icmp_echo_ignore_all — When this parameter is enabled, all ICMP echo packets are ignored. You can use this parameter if you don't want to fool around with the firewall. Prohibiting echo-request packets reduces the traffic, albeit not by much, and makes ineffective any attacks based on using ping packets.
- net.ipv4.conf.*.accept_redirects — This parameter controls accepting router-redirection messages.
- all — Contains configuration files for all interfaces
- default — Holds the default values
- eth0 — Holds configuration files for the first network card
- lo — Holds configuration files for the loopback interface
- net.ipv4.conf.*.secure_redirects — When set, this enables ICMP redirect messages to be accepted only for gateways listed in the default gateway list. It is advisable to enable this parameter only if there is more than one router in your network; otherwise, it should be disabled.
- net.ipv4.conf.*.send_redirects — This parameter allows a computer acting as a router to send ICMP redirect messages to other hosts. If there is more than one router in the network, it is advisable to enable this parameter, so that you can distribute the workload among the routers and not try to route all traffic through the main gateway.
- net.ipv4.conf.*.accept_source_route — This parameter controls whether source-routed packages should be accepted or declined. I already mentioned that such packets can be used to bypass your firewall; thus, you should disable this parameter.
- net.ip_always_defrag — When set, all incoming packets are defragmented. I already explained how the firewall can be bypassed using fragmented packets. It just happens that the firewall checks only the first fragment of the packet and considers the rest of the fragments allowed if the first one passes the check. When this parameter is set, all incoming packets are defragmented, thus making bypassing the firewall using this method impossible.
- net.ipv4.ipfrag_low_thresh — This specifies the minimum amount of memory allocated to reassemble fragmented packets. The higher this value, the fewer memory-allocation manipulations necessary. The default value is 196608. Setting this parameter too high will cause extra memory to be allocated and may result in the server running out of resources for processing data. It is advisable to leave the default value.
- net.ipv4.ipfrag_high_thresh — This specifies the maximum amount of memory allocated to reassemble fragmented IP packets. The default value is 262144. If this value is exceeded, the operating system starts tossing out incoming fragmented packets. In this way, a server can be flooded with trashy fragmented messages causing it to no longer react to fragmented packets.
- net.ipv4.ipfrag_time — This indicates the time in seconds to keep an IP packet fragment in memory. The default value is 30 seconds. This is too much, because during this time hackers can flood the entire cache. In case of an attack on the system, the value should be lowered to 20 or even 10 seconds.
- net.ipv4.tcp_syncookies — This controls whether to send out SYN cookies when the SYN queue of a socket overflows. It is advisable to enable this parameter to ward off SYN flood attacks.
5:43 AM 0
How to Shutdown SUID and SGID Doors for better security

find / \( -perm -02000 -o -perm -04000 \) -ls
130337  64 -rwsr-xr-x   1 root root   60104  Jul  29 2002 /bin/mount
130338  32 -rwsr-xr-x   1 root root   30664  Jul  29 2002 /bin/umount
130341  36 -rwsr-xr-x   1 root root   35040  Jul  19 2002 /bin/ping
130365  20 -rwsr-xr-x   1 root root   19072  Jul  10 2002 /bin/su
neways, i guess u like the post. Enjoy hacking, Enjoy HAckton.
5:35 AM 0
Secure Web Servers with Mod_Security
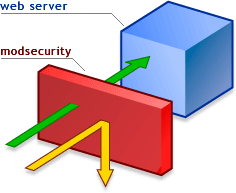
- SecFilterEngine On — Enables the request filtering mode.
- SecFilterCheckURLEncoding On — Checks the validity of the URL encoding.
- SecFilterForceByteRange 32 126 — Specifies to use characters from the particular range only. There are quite a few control characters (e.g., carriage return and line end) whose codes are less than 32. Most of them are invisible but require the corresponding key presses to be processed. How can such a character be entered into a URL string? This can be done using their codes. For example, the end-of-line character is entered in a URL by typing %13. In this case, a URL cannot contain character codes less than 32 and greater than 126.
- SecAuditLog logs/audit_log — Specifies the log file, in which the audit information is to be stored.
- SecFilterDefaultAction "deny,log,status:406" — Specifies the default action. In this case, it is prohibition.
- SecFilter xxx redirect:http://www.Webcreator.com — Provides for redirection. If the rules have been met, the user is redirected to www.webcreator.com.
- SecFilter yyy log,exec:/home/apache/report-attack.pl — Launches a script. If the filter is triggered, the /home/apache/report-attack.pl script will be executed.
- SecFilter /etc/password — Prohibits referencing the /etc/passwd file in user requests. Referencing the /etc/shadow file can be prohibited in the same way.
- SecFilter /bin/ls — Prohibits users from accessing commands. In this case, access to the ls command is prohibited, which can be used to view contents of directories if a script contains a bug. Access to such commands as cat, rm, cp, and ftp should also be prohibited.
- SecFilter "\.\./" — Prohibits dots in URLs. A classic attack is carried out by placing dot characters in a URL.
- SecFilter "delete [[: space: ]]+from" — Prohibits the delete...s from text, which is most often used in SQL queries to delete data. This string is used frequently in SQL injection-type attacks. In addition, I recommend setting the following three filters:
- SecFilter "insert [[: space: ]] +into" — Prohibits the string used in SQL queries for adding data.
- SecFilter "select.+from" — Prohibits the string used in SQL queries for reading data from a database.
- SecFilter "<(.|\n)+>" and SecFilter "<[[:space:]]*script"— Protects against cross-Site Scripting (XSS) attacks.
-
5:32 AM 0
Install Backtrack In Ubuntu

Well, Many of the time i used backtrack, but most oftenly i found myself to do sum extra things in order to use it like an ordinary Linux Diostro. n for all the same, i had find a method to use backtrack in our very own and most popular distro, ubuntu. Just follow these simple steps.
First of all add this to your /etc/apt/sources.list
deb http://repo.offensive-security.com/dist/bt4 binary/Now in order to import the Backtrack GPG key and to update the sources:
wget http://repo.offensive-security.com/dist/bt4/binary/public-key && sudo apt-key add public-key && sudo apt-get updateCool ;) ??
Now you had got all the new Backtrack applications ready to install. You can find these applications in your Synaptic Package Manager, under the sections BackTrack - Web (for example). If you are wanting to install all of the new applications quickly, you can run the following command:
links -dump http://repo.offensive-security.com/dist/bt4/binary/ | awk '{print $3}' | grep -i deb | cut -d . -f 1 > backtrack.txt
This command will use the links text browser to grab a complete list of packages and store them into the file backtrack.txt. Each application will then be installed one by one. As there are 182 files, it may take a long time , so better get ready with it and get a little multitasking :P
I Guess, yuou enjoyed this one. Have a nice time. Feel free to ask any confusion..
Enjoy Hacking, Enjoy Hackton.
2:32 AM 0
List Of Currently Detected Rookits

| 01. lrks, lrk3, lrk4, lrk5, lrk6 (and variants); | 02. Solaris rootkit; | 03. FreeBSD rootkit; |
| 04. torn (and variants); | 05. Ambient's Rootkit (ARK); | 06. Ramen Worm; |
| 07. rh[67]-shaper; | 08. RSHA; | 09. Romanian rootkit; |
| 10. RK17; | 11. Lion Worm; | 12. Adore Worm; |
| 13. LPD Worm; | 14. kenny-rk; | 15. Adore LKM; |
| 16. ShitC Worm; | 17. Omega Worm; | 18. Wormkit Worm; |
| 19. Maniac-RK; | 20. dsc-rootkit; | 21. Ducoci rootkit; |
| 22. x.c Worm; | 23. RST.b trojan; | 24. duarawkz; |
| 25. knark LKM; | 26. Monkit; | 27. Hidrootkit; |
| 28. Bobkit; | 29. Pizdakit; | 30. torn v8.0; |
| 31. Showtee; | 32. Optickit; | 33. T.R.K; |
| 34. MithRa's Rootkit; | 35. George; | 36. SucKIT; |
| 37. Scalper; | 38. Slapper A, B, C and D; | 39. OpenBSD rk v1; |
| 40. Illogic rootkit; | 41. SK rootkit. | 42. sebek LKM; |
| 43. Romanian rootkit; | 44. LOC rootkit; | 45. shv4 rootkit; |
| 46. Aquatica rootkit; | 47. ZK rootkit; | 48. 55808.A Worm; |
| 49. TC2 Worm; | 50. Volc rootkit; | 51. Gold2 rootkit; |
| 52. Anonoying rootkit; |
8:59 PM 0
How To Password Protect Your Linux Box (OS) With GRUB

To get started, let's first encrypt the password we want to use. Open up a terminal and enter the grub command. This brings up a grub shell. In this shell, enter the md5crypt command. When prompted, type in the password you want on your grub entries. (Don't worry, this won't write anything to your files!) After pressing Enter, you will be given an encrypted password string. Copy the string to your clipboard. Enter quit to exit the grub shell and return to bash.
GNU GRUB  version 0.95  (640K lower / 3072K upper memory)

 [ Minimal BASH-like line editing is supported.  For the first word, TAB
   lists possible command completions.  Anywhere else TAB lists the possible
   completions of a device/filename. ]

grub> md5crypt

Password: *************
Encrypted: $1$w7Epf0$vX6rxpozznLAVxZGkcFcs.

grub>
After the "initrd" line for each entry you want to password protect, start a new line beginning with password --md5 and paste in your newly-encrypted password. Using the above example password on the i386 recovery entry, this:
title Ubuntu, kernel 2.6.8.1-2-386 (recovery mode)
        root (hd1,2)
        kernel /boot/vmlinuz-2.6.8.1-2-386 root=/dev/hdb3 ro single
        initrd /boot/initrd.img-2.6.8.1-2-386
Becomes this:
title Ubuntu, kernel 2.6.8.1-2-386 (recovery mode)
        root (hd1,2)
        kernel /boot/vmlinuz-2.6.8.1-2-386 root=/dev/hdb3 ro single
        initrd /boot/initrd.img-2.6.8.1-2-386
        password --md5 $1$w7Epf0$vX6rxpozznLAVxZGkcFcs.
Save the file, and reboot. (The first time you try this, I suggest only doing it to one entry so you can test it to make sure it works, and you can still use another entry to boot your machine in case something went wrong.)
For a bit of added peace of mind, you can prevent everyone except root from reading /boot/grub/menu.lst by doing:
sudo chmod 600 /boot/grub/menu.lst
Thats it u r finished with it.
Hopes u enjoy this., have fun. Enjoy Hacking.. Enjoy Hackton
8:14 PM 0
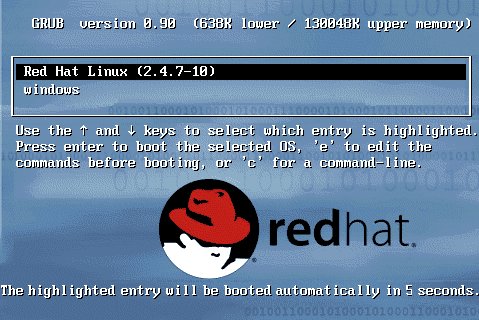
How To hack Linux GRUB Pasword
9:58 PM 0
Free Download Themes For Ubuntu : Learn Latest Computer And Mobile Tricks

Although there are a number of good quality themes available for Ubuntu through various sites like gnome-look and devianart, it is still a tough task to find good themes for Ubuntu 9.10 Karmic Koala, which was released last year, in October 2009. There were only a limited number of new themes added to Karmic Koala. But, we have compiled here a list of free and attractive themes for Ubuntu 9.10 Karmic Koala.
These themes are provided by bisigi project. These themes are very easy to install in Karmic Koala, as you just have to add the required repositories and then type a general command with the name of the theme you want to apply.
e.g: sudo apt-get install theme-name
Follow these steps to add free and attractive themes to Ubuntu 9.10 Karmic Koala:
1. First you have to edit the /etc/apt/sources.list. To do it, open a terminal and type the following command:
gksudo gedit /etc/apt/sources.list
This command will open the file which contains the list of repositories. You have to add the following two lines to this file:
deb http://ppa.launchpad.net/bisigi/ppa/ubuntu karmic main
deb-src http://ppa.launchpad.net/bisigi/ppa/ubuntu karmic main
You can now save the file and exit.
2. In the next step you have to add the repository verification key (GPG Key). To do this, type in the terminal:
gpg --keyserver hkp://keyserver.ubuntu.com:11371 --recv-key 881574DE && 881574DE ">gpg -a --export 881574DE | sudo apt-key add -
Now, you can update the source list by typing this command in the terminal:
sudo aptitude update
3. Now you can install all the themes by typing this command in the terminal:
sudo aptitude install zgegblog-themes
This command will install the following themes in Ubuntu 9.10 Karmic Koala:
Note: To install each theme separately, you can use type the command included with that theme in the terminal.
1. Showtime for Gnome
sudo apt-get install showtime-theme

2. Balanzan
sudo apt-get install balanzan-theme

3. Infinity
sudo apt-get install infinity-theme

4. Wild Shine
sudo apt-get install wild-shine-theme

5. Exotic
sudo apt-get install exotic-theme

6. Tropical
sudo apt-get install tropical-theme

7. Bamboo Zen
sudo apt-get install bamboo-zen-theme
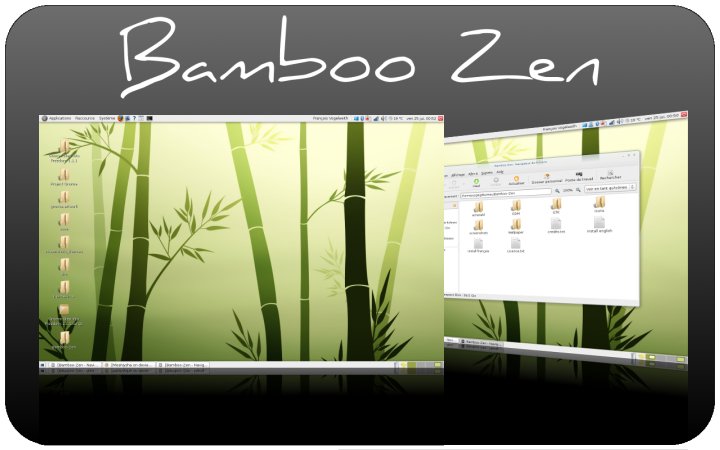
8. Ubuntu Sunrise
sudo apt-get install ubuntu-sunrise-theme

9. Aqua Dreams
sudo apt-get install aquadreams-theme
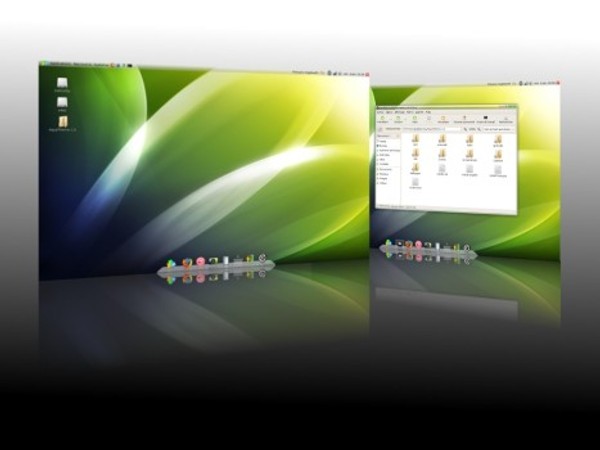
10. Ellanna
sudo apt-get install ellanna-theme

11. Orange
sudo apt-get install orange-theme

If you want to remove the full package containing all these themes, you can type the following command in the terminal:
sudo aptitude remove zgegblog-themes
If you want to remove individual theme, you can remove it by a command in this format:
sudo aptitude remove themename
where themname can be: showtime-theme, balanzan-theme and so on.
Did you liked these themes ? Tell us your experience through comments.
8:13 AM 0
Download Ubuntu Theme for Windows Xp
Ubuntu is one of the popular operating systems while Windows is the largest used OS worldwide. If you are habituated with Ubuntu and recently started working on XP, you can do yourself a favor – install Ubuntu theme for XP so that you can get Ubuntu look and feel on Windows XP. This theme is designed by FioreSSJ at DeviantArt.
But before you read ahead, you need to patch uxtheme.dll file on your system so that non-Microsoft release visual style can be installed on Windows XP. If you have not applied this patch, download the patch from Softpedia and follow the instructions to install it on your system.

Now download Ubuntu theme for XP from here. This theme contains 5 different color schemes such as orange, blue, green, graphite and purple. Additionally it changes the Windows XP cursor and makes it look like xFree cursor. Once you have downloaded thetheme pack, extract the folder and follow the below steps :
- Copy files from Wallpaper folder to C:\Windows\Web\Wallpaper
- Copy files from Cursor folder to C:\Windows\Cursors
- Copy files from Fonts folder to C:\Windows\Fonts
- Copy other files to C:\Windows\Resources\Themes\Ubuntu (Make a new folder & rename it to Ubuntu yourself)
- Click Human to load the visual style
- Click Apply in display properties to save the changes
- You are done.

Ubuntu XP Theme
XP to Ubuntu transformation pack changes the visual style, desktop wallpaper, cursor, and fonts to give you Ubuntu feel and look on your Windows XP system. Now you can proceed to change system icons.
Download Tango Shell Patcher to make Windows XP icons look like Ubuntu 6.10 icons. Download the patch, read the instructions, install on your system and enjoy.
8:30 AM 0
How To Dial-Up Automatically On Startup

Save yourself from having to hand-connect to the Internet before surfing with Firefox.
This hack explains how to automatically dial up your ISP when Firefox starts. Disconnecting is more problematic. Attack that using timeout configuration items provided by the operating system. If you want Firefox to auto-dial for you, this preference must be left on:
network.autodial-helper.enabled /* default = true */
Windows 95/98/98SE/ME
Dial-up technology under these Windows versions has a top layer called Dial Up Networking (DUN). To get this working without fail, make a copy of a Firefox desktop shortcut and change the copy. Change the specified firefox.exe program to run firefox.bat instead. Create that .bat file with these contents:
@echo off
start /B /MIN /W rundll32.exe rnaui.dll,RnaDial "connectoid"
firefox.exe
The string connectoid is the name of the connection icon in the Dial-Up Networking folder. It is case-sensitive. Do not use the name of a desktop shortcut that points to the connection icon. Change the name displayed on the new desktop icon to Firefox Internet or similar.
This fix always works, but there is an alternate way. Firefox has a File Work Offline menu option. If Firefox is started in Offline mode, changing it to Online mode will instruct Firefox to always dial the ISP for you.
It is also possible to make Firefox dial the ISP if the first web page request (such as the home page) fails. In order for this to happen, extra Windows setup is required. In the Internet Options Control Panel item, in the Connections tab, choose any radio button other than the one labeled "Never dial a connection."
Windows NT/2000/XP
Top-level dial-up technology under these Windows versions is called Remote Access Services (RAS). It should be started automatically when any program, including Firefox, attempts to access the Internet. If that's not working for you, check that the RAS Connection Manager and RAS Auto Connection Manager services are enabled using the Services icon in the Control Panel. The rules are otherwise the same as under 95/98/98SE/Me.
If it still isn't working, make a copy of a Firefox desktop shortcut and change the copy. Change the specified firefox.exe program to firefox.bat. Create that .bat file with these contents:
@echo off
start /B /MIN /W rasdial.exe "connectoid"
firefox.exe
The string connectoid is the name of the connection icon, as described in the previous section. It is case-sensitive. Do not use the name of a desktop shortcut that points to the connection icon. To suppress the dialog that prompts for your ISP login details, try this instead:
@echo off
start /B /MIN /W rasdial.exe "connectoid" "username" "password"
firefox.exe
|
3.6.3. Mac OS X
Automatic PPP dial-up under OS X is handled through System Preferencesthe same as automatic Internet connection of all types. To set it up, choose System Preferences under the Apple menu and follow these steps:
-
Click on the Network icon, in the Internet & Network group.
-
From the Show pop-up menu near the top of the window, select your modem.
-
Make sure the PPP tab is selected and click on the PPP Options... button near the bottom of the panel.
-
Tick the first checkbox labeled "Connect automatically when needed."
-
Click OK, and you're all set up.
3.6.4. Linux/Unix
To dial up before Firefox starts, just wrap the command-line call to Firefox in a shell script. Before you're ready to go, you must have the following things in place:
-
Modem hardware that's known (usually present; test with kudzu --probe)
-
Serial and PPP drivers in the kernel (usually present; test with modprobe -l)
-
Correct serial devices in /dev (usually present)
-
Software for PPP, such as pppd (usually present)
-
Software for DHCP, such as dhcpd (usually present)
For example, under Red Hat Fedora Core, much of the work is automated for you. Run this GUI tool and review the information in its help system:
/usr/bin/system-config-network
If no profile is defined for the modem, use the GUI to create one. In the DNS tab, clear all the DNS entries except for DNS Search Path. Enter the ISP's domain name here, making sure the IP address is also recorded, either in the /etc/hosts file or using the tool:
/usr/bin/system-config-bind
If dial-up access via DHCP has been started, Linux DHCP will usually overwrite the /etc/resolv.conf file, which can affect or ruin any existing DNS arrangements that you might have in place.
To configure and run dial-up by hand, configure dhcpd.conf to contain the ISP's DNS and IP Address information. Identify the tty in /dev that matches the modem, and simply run:
pppd /dev/modemtty
dhcpd
Those commands can go in the wrapper script that starts Firefox.
3:58 AM 0

 Posts
Posts

