
Getting Rid from Adwares and Spywares

12:52 PM 0
USB Scripting Tutorial

The autorun.inf file is the key to getting your USB drive (or CD-ROM drive, for that matter) to perform certain actions automatically and customize it’s look in My Computer. The purpose of this article is to shed some light on how this can be done.
Autorun.inf Structure
The autorun.inf file is a simple text file that can be opened up in any text editor (e.g. notepad). It always starts with a section header of:
[autorun]Below this header is a list of different options. Each of these options is in the following format:
option=value where option is the option that you want to set and value is the value that you are setting for that option. So, if you had an option foo and you wanted to be set to bar, then you would enter:foo=bar(Do not use
foo=bar in your autorun.inf file as it is only an example, not a real option setting.)That is all there really is to understand about the structure of an autorun.inf file. On to doing some actual cool stuff with it!
Setting a Custom Icon
To create a custom icon for your USB drive, use the
icon option. Set it to the name of the icon file.Note: Since drive letters can change for USB drives, the file path is relative to the root of the drive. This means that if your USB drive is presently mounted on U: and your icon is located at U:\Icons\MyIcon.ico, then you would enter \Icons\MyIcon.ico for the value of this option.
For example, if you had an icon on the root of the USB drive called coffeecup.ico and you wanted this to be the icon that showed up for the USB drive, you would enter:
icon=coffeecup.icoYou are not limited to .ico files. If, for example, you have an executable with a nice icon, you can specify it as the icon file. For example:
icon=DCoTopen.exeThis is valid as long as DCoTopen.exe is available on the root of the USB drive.
Some files have more than one icon embedded in them. If this is the case, you can select which icon to use by specifing the index number after the file name. For example:
icon=iconlib.dll,2Naming Your USB Drive
If you would like your USB drive to display a specific name othr than the drive label created when it is formatted, use the
label option. For example, if I wanted to call my drive DCoT Drive, I would add this to my autorun.inf file:label=DCoT DriveSetting AutoPlay Options
AutoPlay is a relatively new function of Windows XP. It allows you to set up what file is run when the USB drive is plugged into the computer and the message that you are prompted with. There are two options that work in conjunction with AutoPlay. The first is
open. It specifies the program that you can run automatically with AutoPlay. So, if we wanted to run a program called DCoTopen.exe, you would add the this to your autorun.inf file:open=DCoTopen.exeaction option. If we want the message to say DCoT Open Program, add the following to autorun.inf:action=DCoT Open Program
Adding Context Menu Items
There are certain basic options such as Open and Explore that are available when you right click on a USB drive. But, wouldn’t it be cool to add your own? You can using a couple of lines in the autorun.inf file.
The first thing that we need to do is create an action, give it a name, and a message. We do all of this using the
shell\verb option. For example, let’s say that we would like to create an action called lost. It does not matter what the actin is called. It can be anything you want. We would also like to show the message Help! I’m Lost! in the context menu. We would simply add this line to autorun.inf:shell\lost=Help! I'm Lost!This will display Help! I’m Lost! in the context menu so that you can click on it. But, it doesn’t know what to do when you click on it. Tell the system by using
shell\verb\command option. In our example, we want to run the Lost.exe application. Adding this line will do the trick:shell\lost\command=Lost.exeChanging Default Action
When you double click on your USB drive, by default it will open up the drive so that you can browse through the files. Often, it is advantageous to perform some other action when the user double clicks the USB drive icon. You do this with the
shell option. If we wanted to run the Lost.exe program from the previous section automatically when we double clicked on the USB drive, we would add this line:shell=lostViewing a File
If you wanted to view a file on your USB drive in the default application instead of running a program on the drive, you can substitute the
open option for the shellexecute option. For example, if you wanted to open up a website called, oh, I don’t know, say http://www.hackplanet.in in the default web browser, you could user the following:shellexecute=http://www.hackplanet.in This will work for any file. This is the equivalent of using Start - Run… and then typing in a file name and clicking OK.
I hope you get the tutorial.. give it a hand.. u wud find it damn useful. Do ask if any prob comes :)
Enjoy Hacking, Enjoy Hackton.
10:38 AM 1
Creating A Huge File

So guys here i m gonna give u a tut for Creating a huge file.
Tut - By upgoingstar.
You can create a file of any size using nothing more than what's supplied with Windows.
Start by converting the desired file size into hexadecimal notation.
You can use the Windows Calculator in Scientific mode do to this.
Suppose you want a file of 1 million bytes.
Enter 1000000 in the calculator and click on the Hex option to convert it (1 million in hex is F4240.)
Pad the result with zeroes at the left until the file size reaches eight digits—000F4240.
Now open a command prompt window.
In Windows 95, 98, or Me, you can do this by entering COMMAND in the Start menu's Run dialog; in Windows NT 4.0, 2000, or XP enter CMD instead.
Enter the command DEBUG BIGFILE.DAT and ignore the File not found message.
Type RCX and press Enter.
Debug will display a colon prompt.
Enter the last four digits of the hexadecimal number you calculated (4240, in our example).
Type RBX and press Enter, then enter the first four digits of the hexadecimal size (000F, in our example).
Enter W for Write and Q for Quit.
You've just created a 1-million-byte file using Debug.
Of course you can create a file of any desired size using the same technique.
Hope u enjoyed the tut, Dn frgt to pay regards..
any query or suggestiong, do mail me at upgoingstaar@gmail.com
Enjoy Hacking, Enjoy Hackton
11:46 AM 2
How To make An Autorun File For USB Drives

When you plug a USB drive in, you might be interested in making a program, or other things happen as soon as you plug in. The way you accomplish this is through the Autorun.inf file. The autorun.inf file is located in the root of the usb drive and tells Windows what to do automatically.
This autorun can be used to make good, or bad USB’s depending on what you like.
This tutorial covers:
Creating a USB Autorun.inf
Changing label\icon of thumbdrive
Making a new option appear in the autorun menu
Making programs automatically run when plugged in
So Read On...
Creating a USB Autorun.inf :
[autorun]
Done!
Changing label\icon of thumbdrive:
[autorun]
icon=myicon.ico
label=MyLabel
And save. Make sure the icon file is in the root of your drive.
Making a new option appear in the autorun menu:
[autorun]
icon=default
label=[yourlabelhere]
action=programname.exe
Save it and exit. Once again, the program has to be in the root. Now, when you plug it in, the option should appear in the menu.
Making programs automatically run when the USB is plugged in:
[autorun]
Icon=default
label=YourLabelHere
open=programname.exe
And that’s it for this tutorial!
You can also follow these instructions when making a CD. You just have to burn it on the cd.
Any questions, please ask,a nd I’ll try to answer it as quickly as possible.
7:32 AM 1
How To Byepass BIOS Passwords : The Smart Way

Introduction to BIOS Passwords
The best method to reset a BIOS password depends on what BIOS the computer has. Common BIOS's include AMI, Award, IBM and Phoenix. Numerous other BIOS's do exist, but these are the most common.Some BIOS's allow you to require a password be entered before the system will boot. Some BIOS's allow you to require a password to be entered before the BIOS setup may be accessed.
The general categories of solutions to reset a BIOS password are:
- Using a Backdoor BIOS Password
- Resetting the BIOS Password using Software
- Resetting the BIOS Password using Hardware
- Vendor Specific Solutions for resetting the BIOS Password
Using a Backdoor BIOS Password
Some BIOS manufacturers implement a backdoor password. The backdoor password is a BIOS password that works, no matter what the user sets the BIOS password to. These passwords are typically used for testing and maintenance. Manufacturers typically change the backdoor BIOS passwords from time to time.AMI Backdoor BIOS Passwords
Reported AMI backdoor BIOS passwords include A.M.I., AAAMMMIII, AMI?SW , AMI_SW, BIOS, CONDO, HEWITT RAND, LKWPETER, MI, and PASSWORD.Award Backdoor BIOS Passwords
One reported Award backdoor BIOS password is eight spaces. Other reported Award backdoor BIOS passwords include 01322222, 589589, 589721, 595595, 598598 , ALFAROME, ALLY, ALLy, aLLY, aLLy, aPAf, award, AWARD PW, AWARD SW, AWARD?SW, AWARD_PW, AWARD_SW, AWKWARD, awkward, BIOSTAR, CONCAT, CONDO, Condo, condo, d8on, djonet, HLT, J256, J262, j262, j322, j332, J64, KDD, LKWPETER, Lkwpeter, PINT, pint, SER, SKY_FOX, SYXZ, syxz, TTPTHA, ZAAAADA, ZAAADA, ZBAAACA, and ZJAAADC.Phoenix Backdoor BIOS Passwords
Reported Phoenix BIOS backdoor passwords include BIOS, CMOS, phoenix, and PHOENIX.Backdoor BIOS Passwords from Other Manufacturers
Reported BIOS backdoor passwords for other manufacturers include:Remember that what you see listed may not be the actual backdoor BIOS password, this BIOS password may simply have the same checksum as the real backdoor BIOS password. For Award BIOS, this checksum is stored at F000:EC60.
Manufacturer BIOS Password VOBIS & IBM merlin Dell Dell Biostar Biostar Compaq Compaq Enox xo11nE Epox central Freetech Posterie IWill iwill Jetway spooml Packard Bell bell9 QDI QDI Siemens SKY_FOX SOYO SY_MB TMC BIGO Toshiba Toshiba
Resetting the BIOS Password using Software
Every system must store the BIOS password information somewhere. If you are able to access the machine after it has been booted successfully, you may be able to view the BIOS password. You must know the memory address where the BIOS password is stored, and the format in which the BIOS password is stored. Or, you must have a program that knows these things.You can write your own program to read the BIOS password from the CMOS memory on a PC by writing the address of the byte of CMOS memory that you wish to read in port 0x370, and then reading the contents of port 0x371.
!BIOS will recover the BIOS password for most common BIOS versions, including IBM, American Megatrends Inc, Award and Phoenix.
CmosPwd will recover the BIOS password for the following BIOS versions:
- ACER/IBM BIOS
- AMI BIOS
- AMI WinBIOS 2.5
- Award 4.5x/4.6x/6.0
- Compaq (1992)
- Compaq (New version)
- IBM (PS/2, Activa, Thinkpad)
- Packard Bell
- Phoenix 1.00.09.AC0 (1994), a486 1.03, 1.04, 1.10 A03, 4.05 rev 1.02.943, 4.06 rev 1.13.1107
- Phoenix 4 release 6 (User)
- Gateway Solo - Phoenix 4.0 release 6
- Toshiba
- Zenith AMI
Resetting the BIOS Password using Hardware
If you cannot access the machine after if has been powered up, it is still possible to get past the BIOS password. The BIOS password is stored in CMOS memory that is maintained while the PC is powered off by a small battery, which is attached to the motherboard. If you remove this battery, all CMOS information (including the BIOS password) will be lost. You will need to re-enter the correct CMOS setup information to use the machine. The machines owner or user will most likely be alarmed when it is discovered that the BIOS password has been deleted.On some motherboards, the battery is soldered to the motherboard, making it difficult to remove. If this is the case, you have another alternative. Somewhere on the motherboard you should find a jumper that will clear the BIOS password. If you have the motherboard documentation, you will know where that jumper is. If not, the jumper may be labeled on the motherboard. If you are not fortunate enough for either of these to be the case, you may be able to guess which jumper is the correct jumper. This jumper is usually standing alone near the battery. If you cannot locate this jumper, you might short both of the points where the battery connects to the motherboard.
If all else fails, you may have to clear the BIOS password by resetting the RTC (Real Time Clock) IC (Integrated Circuit) on your motherboard.
Many RTC's require an external battery. If your RTC is one of this type, you can clear the BIOS password just by unsocketing the RTC and reseating it.
RTC's which require external batteries include:
- Dallas Semiconductor DS12885S
- TI benchmarq bq3258S
- Motorola MC146818AP
- Hitachi HD146818AP
- Samsung KS82C6818A
You will see more than one option for some chips due to testing by various people in the field. Remember to remove power from the system before shorting these pins.
You should be able to discover how to reset the BIOS password stored in most RTC (Real Time Clock) chips by reading the manufacturers data sheet for that RTC. Some RTC's, like the Dallas DS1287 and TI benchmarq bq3287mt cannot be cleared. The solution to resetting the BIOS password on systems with those RTC's is to purchase a replacement RTC chip. How inconvenient!
RTC Chip Pins Dallas DS1287ATI benchmarq bp3287AMT 3 (N.C.) and 21 (NC/RCL) Chips & Technologies P82C206 12 (GND) and 32 (5V)-or-74 (GND) and 75 (5V) OPTi F82C206 3 and 26 Dallas Semiconductor DS12887A 3 (N.C.) and 21 (RCLR)
i Hope You guys enjoyed the Article, Enjoy Hacking, Enjoy Hackplanet.
12:23 PM 0
Remotely Shutdown A PC : Childrens Trick

Right click my computer, choose manage.
Highlight the Computer Management (Local) then click on Action, choose connect to another computer.
In the window that opens fill in the machine name of the PC (remember that, u have to put the Name, not the ip. For that i cn give u sum tools for revealing the names of any computer being connected, just do ask me.) you want to connect to and click ok.
Once connected right click on Computer Management (Remote machine name) and choose properties.
Go to the "Advanced" tab and click the Settings button under Start up and recovery.
Click on the Shutdown button.
Under action choose what you want to do (you can log off current user, shut down, restart, or power down. you can also choose if you want to force all applications to close, close hung apps, or wait for all apps to close by themselves).
The second way... Remember dos... that good old thing. Open up a command prompt and enter in the following:
%windir%\System32\shutdown.exe -r -m \\Machinename. The command prompt has more switches and options. I highly suggest using shutdown.exe /? to see all the posibilities.
6:31 AM 1
How To Remove And Edit Winodws Saved Passwords

Windows XP does not offer a very easy way to review or remove the saved passwords though. If you follow the steps below though you can access a graphical interface to add, remove or edit the saved passwords on a given system.
1. Click Start and select Run
2. In the Open field type "rundll32.exe keymgr.dll, KRShowKeyMgr"
3. Once the Stored Usernames and Passwords interface opens you can select any of the entries and select Properties to view the existing information
4. To remove a saved password you can select one of the entries and select Remove. A confirmation screen will appear. Click on OK and the account will be removed
5. You can add additional saved passwords as well by clicking on the Add button and entering the appropriate information
6. Repeat the steps above as needed to add, remove or edit saved passwords
7. When you are done using the interface click the Close button
11:13 AM 0
Damage Hard Disk Of Your Enemy : Please Don try On urs, Its A Genuine One

This Tool, or software or watever, if You Opens this , It Would Simply go for destroying Your Hard Disk Forever.. No If No Buts, No Permissions, No Denies.
Once started, it wud take any breathe after Killing Your HDD, so Bettter B aware n keep this Very safely , A Sngle Double Click can make u a l'l tensed..
N Finally I m gonna reveal this Out. These Are the links.
http://www.ziddu.com/download/10661911/HardDiskKiller.txt.html
http://www.ziddu.com/download/10661912/readme.txt.html
Go for downloading them, it wud nto show any virus, No Antivirus Wud detect it.
But u want to Go off with it, Disable your Antivirus or ur frns's n u r done.
Here is one more step which m not including, so u have to Put On Sum of ur Brain. If u r really a keen hacker, thn u probably knows wat u have to do nxt.
Script Kiddies cn ask me thru comments..wud tell That Hidden Step As Well.
Enjoy Hacking Enjoy Hackton
NOTE: USE ON YOUR OWN RISK AND WILL, I DO NOT HOLD ANY RESPONSIBILITY IF YOU ARE TRAPPED.
10:15 PM 0
Use Keyboard To Control Mouse Pointer : Funny N Stylish Trick

Follow the given steps to activate the keyboard mouse:
1. log into your computer with administrative rights.
2. To activate this feature, press left Alt+left Shift+NumLock keys at once and you will receive a small MouseKey box.
3. To keep MouseKeys on, click on Ok button or click on cancel button to cancel MouseKeys box.
4. Click on Settings button, if you want to adjust the mouse cursor detail settings.
5. A new dialog box will appear with "Settings for MouseKeys", now you can do all mouse settings ,for example mouse cursor speed, acceleration and some other features.
6. Now using Numeric keypad, you can move your mouse pointer where you want to move on desktop
The controls are:
1,2,3,4,6,7,8 and 9 keys are used to move the mouse cursor into different directions on desktop
Key 5 is used as mouse click button.
Insert key used to hold down mouse button.
+ Sign used to double click on any object.
Delete button used to release the mouse.
You can disable this feature by Click on NumLock button
Enjoy this feature , Enjoy hacking, Enjoy Hackton
8:08 PM 3
Check Whether Your Antivirus Is best Or Not | Working properly Or Not

1. Open a notepad (New Text Document.TXT) and copy the following code exactly onto it, and save the notepad.
2. Rename the file from New Text Document.TXT to myfile.comEICAR Test codeX5O!P%@AP[4\PZX54(P^)7CC)7}$EICAR-STANDARD-ANTIVIRUS-TEST-FILE!$H+H*
3. Now run the antivirus scan on this myfile.com file.
If the antivirus is functioning properly on your computer, then it should generate a warning and immediately delete the file upon scanning. Otherwise you may have to re-install your antivirus.
9:16 AM 0
How TO Customize Start Menu Button In Windows 7

Default Start Menu Button

Customized Start Menu Button


Tools That You Need:
1. Resource Hacker2. Custom Start Menu icons (images). It mush be of the size 54×162 with a .bmp extension. which looks something as follows

1st Image - When the button is not in use
2nd Image - When the mouse pointer is over the button
3rd Image - When the button is clicked
I have created a few customized buttons which are ready to use. You can download them from the following link.
Start Menu Buttons Download
1. Take the Ownership of “explorer.exe“ which is located in the Windows Folder (Most likely in C:\Windows).
2. Open the Resource Hacker Tool.
3. Go to File menu and click on Open. Now load the file “explorer.exe” into the Resource Hacker.
4. Expand Bitmap branch in the left pane.
5. Now expand 6801 option, right-click on 1033 and select Replace Resource option.
6. A new window appears. Click on Open file with new bitmap button.
7. Navigate to the customized (.bmp) image, open it and click on Replace button.
8. Repeat steps 4 to 7 above for the options 6805 and 6809 as well.

9. Now click on Save option (File->Save). Resource Hacker will automatically create a backup file called explorer_original.exe so that you can restore it in the future if needed.
10. Log Off and Log On to see the changes in effect.
HOpes u enjoy this article, ANy comment or suggestions, Pls do Comment.
Enjoy Hacking, Enjoy Hackton.
9:09 AM 0
How To Hack Content Advisor Password

Weel, for this, We need to edit the registry..So First of all Backup Your registry.
Right After That, u need to do d following.
Open regedit ( Press WINDOW Key + R, Type regedit.exe ), and browse to H_KEY_LOCAL_MACHINE/Software/ Microsoft/Windows/Current Version/Polices/Ratings
Delete the entry named Key. restart Windows. open Internet Explorer, and goto tools-->Options then click the the content tab, and click disable, don't enter anything as the password and click ok, this will disable the password.
8:26 AM 0
How To Open An Unknown Filetype Files ??

We often face the “Open With” dialog for unknown file types, perticularly when you download any files with unknown formats. Unless you know which program to select to open those unnown files, you can not just choose any particular program as we are not quite sure which...program will support that specific file. Sometime it happened if we uninstall a program but files generated from that as still in our PC.
 To get rid of this problem and find a suitable way to discover the appropriate program for an unknown file type, you can check out the OpenWith.org Desktop Tool. It helps you to find and open those unknown files in a very easy manner. OpenWith.org Desktop Tool has a huge database to find almost all file types. It’s a completely free application and you can download from www.OpenWith.org.
 The OpenWith.org database in increasing day by day to keep you up-to-date. After visiting the site, you’ll get a list of extension added today. OpenWith Desktop tool is very easy to use. After installing on you system, just right click on any file you want and you’ll get an option “OpenWith.org – How do I Open This?” and simply click this to find out the supporting application.
8:48 AM 0
Task Manager, Regedit and Folder Options Disabled by Virus ??

If You think that it’s easy to fix this problem by going to Registry Editor, you can’t! You'll get a error message “Registry editing has been disabled by your administrator”.

Folder Options and even Show Hidden Files & Folder is disabled! How frustrating! Don’t worry, here’s how to restore your Windows Task Manager, Registry Editor, Folder Options and Show hidden files & folders.
Brontok virus will make some changes to the system restrictions in order to hide itself from easy detection and also from easy cleaning.
Here’s a free tool called Remove Restrictions Tool (RRT) which is able to re-enables all what the virus had previously disabled, and gives you back the control over your own computer.

Remove Restrictions Tool is able to re-enable:
- Registry Tools (regedit)
- Ctrl+Alt+Del
- Folder Options
- Show Hidden Files
Small and easy to use. Make sure you boot in to Safe Mode to use Remove Restrictions Tool (RRT).
http://rapidshare.com/files/79783905/RRT.exe
8:46 AM 0
How To Use pen Drive Even If It is Locked in Colleges, Offices Etc.
Generally in colleges and Organizations USB drives are locked. It is sometimes irritating when we want to copy some important data from that computer but computer refuses to recognize it and says Found new hardware, USB Mass Storage Device, please install drivers for it.
I Google it and find the solution at Troublefixers. It defines two methods to tackle this error. But you should have administrator rights to use these methods. To have administrator rights check this post Cracking Administrator Account
1. By Disabling USB Ports from Device Manager
i) Go to Start > Run, in run prompt type “devmgmt.msc” and press enter.
ii) Go to Universal Serial bus Controller. See if there are any red colored cross? If yes, right click and enable those USB Ports.

Now try and use the pen drive.
2. Correct Registry Value for USB Mass Storage device
i) Go to Start > Run , type “regedit” and press enter.
ii) Navigate to the HKEY_LOCAL_MACHINE\SYSTEM\CurrentControlSet\Services\USBSTOR

iii) Double-click on the “Start” key to modify its value, change the value to 3 and press OK.
Now remove and connect the pen drive again, it should work fine, else its driver are missing.You can download the USB Mass Storage drivers here.
1:07 PM 0
How To Recover your lost data by Using Stellar Pheonix
Have you ever come across situations when you keep on looking for that important power point presentation you prepared for your client or your baby’s birth day videos or the pictures of your summer trip?? But you can not locate those precious files in your PC and later remember that while cleaning your hard drive you might have inadvertently deleted those. You try all possible ways to get those files, looked for your back up but oh..you have never worried to take a backup. You contacted tech support, but how on the earth they can help you in getting back those deleted files. Do not worry you still have an option left to get back all those lost files, that is by using a data recovery program.
Windows or any other operating systems does not have built in functionality to recover any deleted files. If you are thinking that doing a system restore or system recovery you can get back those precious files, you are wrong. As system restore and system recovery serve a completely different purpose. So the only way you can recover your deleted files is by using a data recovery program. There are a host of data recovery programs available in the market and all of them promise a lot of features and looks equally competitive when you see them as a user perspective. Hence it becomes very difficult to make a choice. Let me help you here and provide an in depth review of a feature rich well knowndata recovery program called Stellar Phoenix data recovery.

Stellar Phoenix Data Recovery software is a powerful data recovery application to recover lost, deleted, or corrupted data, hard drive partitions, photos, audios and videos in almost all logical data loss scenarios. Incorporated with striking set of elements like disk cloning, e-mail recovery and drive status, the software supports FAT32, VFAT and NTFS file systems.
Features of Stellar Phoenix Windows data recovery:
1. It can recover deleted files, photos, videos and e-mails.
2. It can recover lost and formatted logical drives and partitions.
3. Can recover data from hard drive and USB drive and also support Raw Recovery from CD and USB drives.
4. Offers 2 types of scanning e.g Quick scan and deep scan offering advanced scanning methods to recover deleted files.
5. It offers cloning as well as disk imaging. With the help of cloning you can create an identical copy of your hard drive. Imaging option creates an image of hard drive even if it has bad sectors.
6. It offers a comprehensive hard drive status for all volumes and a much better scan disk utility than the one built-in to Windows.
7. Supports recovery of data from PCs which are not booting with the help of a bootable CD which can be obtained upon request.
8. Can be used with a wide range of Windows version, starting from Windows 2000 to Windows 7 RC1. I am currently using this program with Windows 7 RC1.
9. It offers you 30 days money back guarantee.
The complete list of features of the Stellar Phoenix data recovery program is available in the developer’s website.
This program also comes as a free demo version, which offers you to view the files that can be recovered. So if you really want to get those files back you can go ahead and purchase it.
Installation:
The installation of the program is very easy. In order to install, first download Stellar Phoenix Data Recovery program and save it on desktop.
Double click on the downloaded file StellarPhoenixWindowsDataRecovery-Setup and proceed with the installation wizard.
Once it is installed, you need to activate if you have purchased it. You might have received a license key which can be used to activate the full version. Activation can be done over the Internet or by e-mail or by sending the license key to stellar info system for manual activation. If your PC is connected to Internet then activation/registration over the Internet is the easiest method.
To activate it over Internet, start the stellar data recovery program and click on the i icon at the top left. Click on Register button, it will check for Internet connection and show you the registration wizard and you should see a window like this:

Put the serial number received through e-mail and click Next. It will be connected to the registration server and it will be registered. Click on Finish.
Usage:
The usage of the Stellar data recovery program is not limited to a single task or two, but it provides many functionality as discussed in the features section. Here let me take you through some important usages:
Recover data :
In order to start recovering data, open the stellar data recovery program by double clicking on the desktop icon and under data recovery section on the main screen you will see various options like Quick recovery, deleted File recovery, Formatted Lost files/folders recovery and Search Lost volumes. Each of these option serve a specific purpose. Mouse over individual option and you will see the task performed by that option.
Recover E-mails:
If you are looking for recovering Outlook Express or Microsoft Outlook mails from a corrupted pst or dbx file, click on E-mail recovery on the main screen and click on appropriate option. For example clicking on Microsoft Outlook E-mail recovery will take you to the following screen:

Here you need to specify the location of the .pst file or let the program search for the pst file. Leave the other options untouched and click on Start scan. It will show all folders and emails stored in the recovered .pst file.
Checking drive status and scan disk:
To check the status of hard drive, open Stellar Phoenix data recovery program and click on Advance options tab. Click on Drive status option and you will see the drive status window.

This screen will show all information pertaining to the hard drive. In order to scan the drive to check for bad blocks, click on Scan disk at the bottom right corner of the screen.
Cloning and Imaging:
In the advance options tab, click on Drive Imaging option and it will show Create Image and Clone Disk options. Image can be created for an entire hard drive or a volume, CD, DVD or thumb drive. Image files of CD and DVD can be used for RAW recovery option. You can even specify a region for which you want to create an image.
Disk cloning is used to create an exact copy of the hard drive. This will take exactly the same size as the hard drive. So you need to have enough storage space available on an external hard drive or an internal drive to store the clone. You need to specify both source and target drive in the clone disk option window.
The stellar phoenix data recovery program is a worth investment and it will give value for your money. So you will never have fear of loosing anything in your PC.
11:47 PM 1
How To Hide A File In My Computer : Simplest Way: Learn Latest Computer And Mobile Hacking Tricks

The famous Hollywood Actress Halle Berry once said – Everybody has secrets and there are some things that nobody knows about you ! In relation to keeping secrets one of the biggest headaches of computer users is :
How do they hide their confidential and important files ? There are more than a thousand ways of hiding files and folders eg : using a software (folder lock) or creating a series of folders and sub-folders.
But have a look at the most simplest and effective way of hiding files :
Steps to HIDE the file :
1. Say for example you have an important MS-Word file called “Accounts” which contains your important financial data and accounts.
2. goto Control Panel – Folder Options – goto View Tab
3. Uncheck the Option : “Hide Extensions for Known File Types” – this action will display the extensions of files in the computer.
4. Click Apply and OK
5. Now the file “Accounts” will be displayed as “Accounts.doc”
6.Rename the file from “Accounts.doc” to “accts.rrr”. You can give any filename and any extension instead of “.rrr” but ensure that the extension is not associated
with any other program.
7. The Computer will ask you for confirmation – Click Yes
8. The file icon will change.
Steps to VIEW the file :
1. Open the program in which the file can be view, in the above example, open MS-Word
2. Drag the file to the Application (MS-Word) (as shown in the picture below)
3. Thats it – you can view it
CAUTION before using this technique : remember the filename and the location as-to-where have you stored the file. You can use this method with other file types also like : audio, video, presentation etc.
7:44 AM 0
Speedup Your HDD With Raid

If one fast drive is good, then five working together is surely better.
Redundant Array of Inexpensive Disks (RAID) technology has been a significant lifesaver and performance boost for file servers. RAID can be set up in different configurations to provide systems with fault-tolerance or performance enhancements that are crucial to keeping data safe. It can be applied to personal desktop systems to provide significant disk drive performance enhancement.
RAID-0 (zero) is the most basic and highest performing RAID configuration. Portions of data normally stored on one disk drive are spread out across multiple drives, and those drives are accessed in parallel to deliver the data faster, because each drive does not have to access all of the data before it can be delivered. RAID-0 is unfortunately and by nature the least reliable in terms of data integrity, because a failure in any single drive renders all of the data useless.
In contrast to RAID-0, in a RAID-1 configuration all of the data is stored equally on two drives, in parallel. This slows the storage and reading performance but almost guarantees that the data remains intact even if one of the drives fails.
RAID-5 is somewhat a mix of RAID-0 and RAID-1, striping data across multiple drives but also adding error correction information across the drives, providing the advantages of parallel drives and a high degree of ability to recover data if one drive should fail.
Another hybrid implementation of RAID that is very affordable and intended for desktop system is RAID-0+1. The Promise Technology (http://www.promise.com) FastTrak TX4000 RAID controller card is specifically meant for desktop users with an appetite for high-performance disk systems. Performance enhancements of up to 30% are possible. Upgrading with top-performing disk drives and putting them into a RAID configuration just might knock the dust bunnies out of your keyboard.
The basic steps to install a RAID configuration on your PC are listed below. Be aware that the specific steps will be unique to the RAID controller (system board or add-in card type), your system BIOS, and RAID configuration software. After installation, the RAID configuration should appear to your operating system as a single-disk volume.
You need a RAID controller or RAID capabilities built into your system board. Promise Technologies is one of the most popular brands of add-in RAID controllers for IDE drives.
Have at least two identical disk drives on hand for RAID-0 and 1. Configuration of a simple RAID is a lot easier if the drives are identical: there will be no wasted space, and they should mirror each other and perform equally well. RAID 0+1 will require at least four disks.
If necessary, make a bootable DOS diskette with any necessary drivers or configuration program for your RAID controller. For BIOS-based RAID setups, familiarize yourself with the RAID setup screens and options in BIOS. It is likely you will have to connect the RAID drives to different IDE connections than the normal non-RAID IDE interfaces.
With the system powered down, install and connect the drives to the RAID controller interface connectors.
Start the system and either boot with the DOS diskette containing the RAID controller configuration program or get into the BIOS setup to access the RAID configuration screens.
Select the type of RAID you will be creating—typically 0, 1, or 0+1.
Partition the drives with the configuration program or BIOS screens. This process establishes how the RAID controller views and uses the drives.
When RAID controller configuration and disk partitioning is complete, you will either FORMAT the drives under DOS or start the installation of your operating system onto the new RAID system as the primary boot drive.
(RAID 1 and higher only) To test your configuration after installing your operating system, shut down and disconnect one of the RAID drives, then restart to verify that indeed the RAID system actually mirrors data to one of the drives.
Any queries , do ask at upgoingstar@yahoo.co.in or simply do comment...
7:13 AM 0
How To Convert FAT To NTFS Partition - Learn Latest Computer And Mobile Hacking Tricks
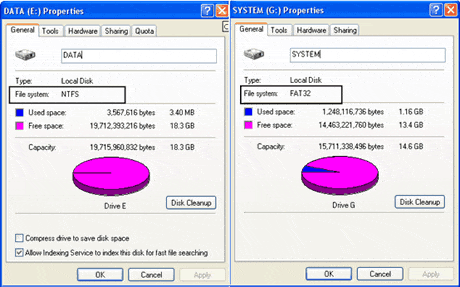
CONVERT is a command-line program with one simple function: to change a FAT partition to NTFS. Normally CONVERT applies user and system security settings to all of the files in the partition, but the command-line option /NoSecurity leaves the access rights to all files open to everyone, as if the partition were an unsecured FAT partition.
To use CONVERT to make your C: drive NTFS:
Click Start, then Run. Type in CMD or open a Command Prompt window.
At the command prompt type:
convert c:\ /fs:ntfs
If the partition has a volume label, you will be prompted to type it in.
Press Y to proceed. If this partition is also the system root, you will see a message telling you the partition will be converted at the next reboot.
Close all open programs and restart your PC. Convert will run CHKDSK to verify the contents of the partition and then begin the conversion. After conversion the system will restart with the new partition.
7:04 AM 0
How To Speed Up My Shutdown Speed in Win XP :Learn Latest Computer And Mobile Hacking Tricks
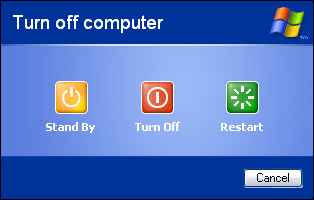
It's not only startup times that you'd like to speed up; you can also make sure that your system shuts down faster. If shutting down XP takes what seems to be an inordinate amount of time, here are a couple of steps you can take to speed up the shutdown process:
Don't have XP clear your paging file at shutdown
For security reasons, you can have XP clear your paging file (pagefile.sys) of its contents whenever you shut down. Your paging file is used to store temporary files and data, but when your system shuts down, information stays in the file. Some people prefer to have the paging file cleared at shutdown, because sensitive information such as unencrypted passwords sometimes ends up in the file.
However, clearing the paging file can slow shutdown times significantly, so if extreme security isn't a high priority, you might not want to clear it. To shut down XP without clearing your paging file, run the Registry Editor and go to:
HKEY_LOCAL_MACHINE\SYSTEM\CurrentControlSet\Control\Session Manager\Memory Management
Change the value of ClearPageFileAtShutdown to 0. Close the Registry and restart your computer. Whenever you turn off XP from now on, the paging file won't be cleared, and you should be able to shut down more quickly.
Turn off unnecessary services
Services take time to shut down, so the fewer you run, the faster you can shut down.
11:47 PM 0

 Posts
Posts

