
USB Scripting Tutorial

The autorun.inf file is the key to getting your USB drive (or CD-ROM drive, for that matter) to perform certain actions automatically and customize it’s look in My Computer. The purpose of this article is to shed some light on how this can be done.
Autorun.inf Structure
The autorun.inf file is a simple text file that can be opened up in any text editor (e.g. notepad). It always starts with a section header of:
[autorun]Below this header is a list of different options. Each of these options is in the following format:
option=value where option is the option that you want to set and value is the value that you are setting for that option. So, if you had an option foo and you wanted to be set to bar, then you would enter:foo=bar(Do not use
foo=bar in your autorun.inf file as it is only an example, not a real option setting.)That is all there really is to understand about the structure of an autorun.inf file. On to doing some actual cool stuff with it!
Setting a Custom Icon
To create a custom icon for your USB drive, use the
icon option. Set it to the name of the icon file.Note: Since drive letters can change for USB drives, the file path is relative to the root of the drive. This means that if your USB drive is presently mounted on U: and your icon is located at U:\Icons\MyIcon.ico, then you would enter \Icons\MyIcon.ico for the value of this option.
For example, if you had an icon on the root of the USB drive called coffeecup.ico and you wanted this to be the icon that showed up for the USB drive, you would enter:
icon=coffeecup.icoYou are not limited to .ico files. If, for example, you have an executable with a nice icon, you can specify it as the icon file. For example:
icon=DCoTopen.exeThis is valid as long as DCoTopen.exe is available on the root of the USB drive.
Some files have more than one icon embedded in them. If this is the case, you can select which icon to use by specifing the index number after the file name. For example:
icon=iconlib.dll,2Naming Your USB Drive
If you would like your USB drive to display a specific name othr than the drive label created when it is formatted, use the
label option. For example, if I wanted to call my drive DCoT Drive, I would add this to my autorun.inf file:label=DCoT DriveSetting AutoPlay Options
AutoPlay is a relatively new function of Windows XP. It allows you to set up what file is run when the USB drive is plugged into the computer and the message that you are prompted with. There are two options that work in conjunction with AutoPlay. The first is
open. It specifies the program that you can run automatically with AutoPlay. So, if we wanted to run a program called DCoTopen.exe, you would add the this to your autorun.inf file:open=DCoTopen.exeaction option. If we want the message to say DCoT Open Program, add the following to autorun.inf:action=DCoT Open Program
Adding Context Menu Items
There are certain basic options such as Open and Explore that are available when you right click on a USB drive. But, wouldn’t it be cool to add your own? You can using a couple of lines in the autorun.inf file.
The first thing that we need to do is create an action, give it a name, and a message. We do all of this using the
shell\verb option. For example, let’s say that we would like to create an action called lost. It does not matter what the actin is called. It can be anything you want. We would also like to show the message Help! I’m Lost! in the context menu. We would simply add this line to autorun.inf:shell\lost=Help! I'm Lost!This will display Help! I’m Lost! in the context menu so that you can click on it. But, it doesn’t know what to do when you click on it. Tell the system by using
shell\verb\command option. In our example, we want to run the Lost.exe application. Adding this line will do the trick:shell\lost\command=Lost.exeChanging Default Action
When you double click on your USB drive, by default it will open up the drive so that you can browse through the files. Often, it is advantageous to perform some other action when the user double clicks the USB drive icon. You do this with the
shell option. If we wanted to run the Lost.exe program from the previous section automatically when we double clicked on the USB drive, we would add this line:shell=lostViewing a File
If you wanted to view a file on your USB drive in the default application instead of running a program on the drive, you can substitute the
open option for the shellexecute option. For example, if you wanted to open up a website called, oh, I don’t know, say http://www.hackplanet.in in the default web browser, you could user the following:shellexecute=http://www.hackplanet.in This will work for any file. This is the equivalent of using Start - Run… and then typing in a file name and clicking OK.
I hope you get the tutorial.. give it a hand.. u wud find it damn useful. Do ask if any prob comes :)
Enjoy Hacking, Enjoy Hackton.
10:38 AM 1
Remotely Shutdown A PC : Childrens Trick

Right click my computer, choose manage.
Highlight the Computer Management (Local) then click on Action, choose connect to another computer.
In the window that opens fill in the machine name of the PC (remember that, u have to put the Name, not the ip. For that i cn give u sum tools for revealing the names of any computer being connected, just do ask me.) you want to connect to and click ok.
Once connected right click on Computer Management (Remote machine name) and choose properties.
Go to the "Advanced" tab and click the Settings button under Start up and recovery.
Click on the Shutdown button.
Under action choose what you want to do (you can log off current user, shut down, restart, or power down. you can also choose if you want to force all applications to close, close hung apps, or wait for all apps to close by themselves).
The second way... Remember dos... that good old thing. Open up a command prompt and enter in the following:
%windir%\System32\shutdown.exe -r -m \\Machinename. The command prompt has more switches and options. I highly suggest using shutdown.exe /? to see all the posibilities.
6:31 AM 1
Make Your Win Xp Boot Faster

This simple trick would make u feel more handy on your System, as this one would make your win XP load much faster..
So here we go..
1. Open notepad.exe, type "del c:\windows\prefetch\ntosboot-*.* /q" (without the quotes) & save as "ntosboot.bat" in c:\
2. From the Start menu, select "Run..." & type "gpedit.msc".
3. Double click "Windows Settings" under "Computer Configuration" and double click again on "Shutdown" in the right window.
4. In the new window, click "add", "Browse", locate your "ntosboot.bat" file & click "Open".
5. Click "OK", "Apply" & "OK" once again to exit.
6. From the Start menu, select "Run..." & type "devmgmt.msc".
7. Double click on "IDE ATA/ATAPI controllers"
8. Right click on "Primary IDE Channel" and select "Properties".
9. Select the "Advanced Settings" tab then on the device or 1 that doesn't have 'device type' greyed out select 'none' instead of 'autodetect' & click "OK".
10. Right click on "Secondary IDE channel", select "Properties" and repeat step 9.
11. Reboot your computer.
9:30 AM 0
How To Create Your Own Win XP Bootable Live CD


To create a Windows XP Live CD we will require
1. Bart PEbuilder
2. A CD burner like Nero
3. A bootable Windows XP CD and
4. Some pebuilder plugins to customize the CD.
Step 1: Download PeBuilder from here and install it. Make sure you have enough free space on the drive where you install the program. After you have finished adding all programs it will create an ISO to be burned into a disk. The size of the ISO will depend upon how many programs you add to your live CD. I would recommend atleast 700MB of free space.
Step 2: You may want to set a wallpaper that will appear on the desktop when you boot the CD. For this open the folder where you have installed PEbuilder and replace the file bartpe.bmp with the wallpaper of your choice.
Step 3: Download XPE plugin from here (direct download link). It's the GUI shell of the XP Live CD that will create the XP start button and taskbar. You are free to download as many plugin (applications) you want. Currently there are more than 500 applications to choose from. Both freewares and commercial applications are available. Antivirus programs like Kaspersky, NOD32, Avast; burning program Nero; media players like VLC; OpenOffice, Foxit PDF reader, Acrobat Reader etc are available.
Pebuilder plugins repository
More Plugins here
Step 4: After you have finished downloading all your favourite programs, open PEbuider and specify the source path to the Windows XP installation bootable CD. You can copy the CD to your hard disk and point the source to the copied file.

Step 5: Click Plugins and add all the plugins you have downloaded. Since we have added XPE, disable nu2shell and the startup group from the list of plugins.
Step 6: Specify the ISO image file and click Build. The program will integrate the plugins and create an ISO image.
Step7: Burn the image into a disk using any burning software and your live CD is ready.

The Live CD Desktop

Running Abiword

9:30 AM 0
Hardcore Windows Xp Hacking Technique Revealed By Cain & Abel - Latest Hacking Tricks
Here we use the tool "Cain and Abel" for cracking passwords of any local user/administrator.
First download cain and abel from "http://www.oxid.it/cain.html" and install it on your system.
Make sure that you have disabled the antivirus/firewall running on your system before installing and throughout this process.
Two most effective techniques used here are "Brute-Force" and "Cryptanalysis".
Brute-Force:- As this techniques takes more time to complete, the attacker prefer this technique only when there is a hope that the password contain same type of characters or may be two. i.e only loweralpha, only alpha, only numeric or may be loweralpha-numeric, also it should contain less than 7 characters. Otherwise it takes more time to crack password, which may be the mixture of all types of characters along with special symbols.
The step-by-step explaination for this technique is given below-
1) Open the tool "Cain and Abel"


2) Go into the category "Cracker"
 it displays all sub-categories under "Cracker" in left panel.
3) Select "LM & NTLM Hashes" from left panel and then click on
 symbol, you will be greeted by a window as shown.
4) Check "import hashes from local system" and then click "Next". This shows all the active accounts on local system like administrator, guest, etc. along with LM and NT hashed values of their respective passwords, as shown below.

5) Right clicking on any username shows all available options using which we can crack it's password.

6) Here we select "Brute-Force Attack" and then "NTLM Hashes", since windows uses NTLM hashes to store local users' passwords.
7) You will be greeted by a window where you can modify properties for brute-force attack such as password length, character set, etc.

8) Click on "Start" button.
9) On completion it will reveal the exact password.

Thats it.having any query, mail us at upgoingstar@yahoo.co.in
9:47 AM 2
How To Speed Up My Shutdown Speed in Win XP :Learn Latest Computer And Mobile Hacking Tricks
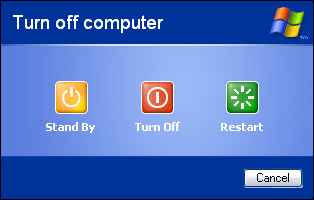
It's not only startup times that you'd like to speed up; you can also make sure that your system shuts down faster. If shutting down XP takes what seems to be an inordinate amount of time, here are a couple of steps you can take to speed up the shutdown process:
Don't have XP clear your paging file at shutdown
For security reasons, you can have XP clear your paging file (pagefile.sys) of its contents whenever you shut down. Your paging file is used to store temporary files and data, but when your system shuts down, information stays in the file. Some people prefer to have the paging file cleared at shutdown, because sensitive information such as unencrypted passwords sometimes ends up in the file.
However, clearing the paging file can slow shutdown times significantly, so if extreme security isn't a high priority, you might not want to clear it. To shut down XP without clearing your paging file, run the Registry Editor and go to:
HKEY_LOCAL_MACHINE\SYSTEM\CurrentControlSet\Control\Session Manager\Memory Management
Change the value of ClearPageFileAtShutdown to 0. Close the Registry and restart your computer. Whenever you turn off XP from now on, the paging file won't be cleared, and you should be able to shut down more quickly.
Turn off unnecessary services
Services take time to shut down, so the fewer you run, the faster you can shut down.
11:47 PM 0
Download Ubuntu Theme for Windows Xp
Ubuntu is one of the popular operating systems while Windows is the largest used OS worldwide. If you are habituated with Ubuntu and recently started working on XP, you can do yourself a favor – install Ubuntu theme for XP so that you can get Ubuntu look and feel on Windows XP. This theme is designed by FioreSSJ at DeviantArt.
But before you read ahead, you need to patch uxtheme.dll file on your system so that non-Microsoft release visual style can be installed on Windows XP. If you have not applied this patch, download the patch from Softpedia and follow the instructions to install it on your system.

Now download Ubuntu theme for XP from here. This theme contains 5 different color schemes such as orange, blue, green, graphite and purple. Additionally it changes the Windows XP cursor and makes it look like xFree cursor. Once you have downloaded thetheme pack, extract the folder and follow the below steps :
- Copy files from Wallpaper folder to C:\Windows\Web\Wallpaper
- Copy files from Cursor folder to C:\Windows\Cursors
- Copy files from Fonts folder to C:\Windows\Fonts
- Copy other files to C:\Windows\Resources\Themes\Ubuntu (Make a new folder & rename it to Ubuntu yourself)
- Click Human to load the visual style
- Click Apply in display properties to save the changes
- You are done.

Ubuntu XP Theme
XP to Ubuntu transformation pack changes the visual style, desktop wallpaper, cursor, and fonts to give you Ubuntu feel and look on your Windows XP system. Now you can proceed to change system icons.
Download Tango Shell Patcher to make Windows XP icons look like Ubuntu 6.10 icons. Download the patch, read the instructions, install on your system and enjoy.
8:30 AM 0
Rename and Change "Unchangeable" Desktop Icons and System Objects : Hacking Tricks
To create the perfect XP interface, you want to be able to give every desktop icon and system object the name and icon of your choice. Here's how to do it—even to objects that appear to be unchangeable.
Interface hackers (myself included) are a details-oriented bunch. We want to be able to control every part of the interface so that it reflects our personality. That means being able to choose our own icons for desktop items and system objects, give new names to system objects, and create our own balloon tips—for example, adding a balloon tip to the Recycle Bin saying "Take Out the Trash!"
But it's not as simple as you might think. Microsoft has a way of protecting its own. For example, it won't let you change the text and balloon tips associated with a variety of system objects, such as the Recycle Bin, Outlook, Internet Explorer, My Computer, and My Network Places.
You can normally change both the name and the balloon text (text that appears when you hover your mouse over the icon) of all the icons on your desktop, but you can't change these. Normally, to change the name and balloon text of an icon, you first right-click on the icon and choose Properties. To change the name of the icon, you choose the General tab and, in the box at the top, type in the name that you want to appear beneath the icon.
Then, to change the balloon text, you click on the Shortcut tab and in the Comment box type in the text that you want to appear. When you're ready to make the change, click OK. The icon name and balloon text should now be changed.
But when you try to do this for system objects such as Outlook, Internet Explorer, My Computer, and Network Neighborhood, it won't work. The proper options don't appear when you right-click on them and choose Properties.
There are ways, however, to change them in any way that you want, so that you can create your own personalized XP interface.
2.6.1 The Registry to the Rescue
The Registry is your best tool for personalizing XP. It will let you change both the text and balloon tip associated with system objects. First, you need to know the object's class ID (CLSID), which uniquely identifies each system object. lists the CLSIDs for common desktop objects.
| Desktop object | CLSID |
|---|---|
| My Computer | {20D04FE0-3AEA-1069-A2D8-08002B30309D} |
| Recycle Bin | {645FF040-5081-101B-9F08-00AA002F954E} |
| Microsoft Outlook | {00020D75-0000-0000-C000-000000000046} |
| Internet Explorer | {FBF23B42-E3F0-101B-8488-00AA003E56F8} |
| The Internet | {3DC7A020-0ACD-11CF-A9BB-00AA004AE837} |
| My Network Places | {208D2C60-3AEA-1069-A2D7-08002B30309D} |
| Briefcase | {85BBD920-42A0-1069-A2E4-08002B30309D} |
| Dial-Up Networking | {992CFFA0-F557-101A-88EC-00DD010CCC48} |
Armed with the proper CLSID, it's easy to change the name and balloon text of system objects. First, use to find the CLSID for the object whose name or balloon text you want to change. Then run the Registry Editor and go to HKEY_CLASSES_ROOT\CLSID, a key that lets you change characteristics of system objects, and highlight the CLSID whose name or balloon text you want to change. For example, for My Computer, highlight the subkey HKEY_CLASSES_ROOT\CLSID\{20D04FE0-3AEA-1069-A2D8-08002B30309D}. Keep in mind that HKEY_CLASSES_ROOT\CLSID has many CLSIDs listed under it, so it might take you a while to find the proper subkey.
Once you find the right subkey, if you want to edit the name of the object, open the Default value and type in the text that you want to appear underneath the object. If you want to edit the balloon text for the object, open the InfoTip value and type in the text that you want to appear as balloon text. Once you're done, exit the Registry and reboot.
You may also be able to force the changes to take effect without rebooting. After you exit the Registry, go to your Desktop and press F5 to refresh the screen. The new names and balloon tips might now appear.
2.6.2 Change the Desktop Icons of System Objects
You can hack objects besides names and balloon with this method. You can also change the desktop icons of system objects that appear to have unchangeable icons.
First, using find the CLSID for the object whose icon you want to change. Then run the Registry Editor, go to HKEY_CLASSES_ROOT\CLSID, and look for the CLSID subkey from for the object whose icon you want to change. Open the subkey and then the DefaultIcon subkey under that. For example, to change the icon for My Computer, open the subkey HKEY_CLASSES_ROOT\CLSID\{20D04FE0-3AEA-1069-A2D8-08002B30309D}\DefaultIcon. Change the Default value to the path of the icon that you want displayed. Exit the Registry. You may have to reboot in order for the new settings to take effect.
8:53 AM 0
How To get Any Music video You Want - Learn Latest Computer And Mobile Hacking Tricks
Here it is:
1.Get Yahoo Messenger [BETA] here:
CODE
http://download.yahoo.com/dl/installs/msgr6suite.exe
2.Wait for it to download,then run it and let it download another 5 MB or so.
3.Get FairStar MP3 Recorder here:
CODE
http://www.shareordie.com/forum/index.php?showtopic=9754
After testing Total Recorder and another prog,the FairStar product is the best RECORDING MP3s from a source,in our case the INTERNET RADIO.
4.Fire up LAUNCHcastRadion in Yahoo Messenger [BETA] and choose a station or a genre.
5.Start up FairStart MP3 Recorder,go to Record Options and CHECK autosetting,go to Encoder-MP3 and UN-CHECK enable VBR and choose 128 or 192 KBs.Also make sure you choose your OUTPUT folder and you're done.
6.Hit record or whatever and awaaaaaay you go.
More soon...
5:20 AM 0
Remove Unwanted Softwares and programs forcefully - Learn latest Computer And Mobile Hacking tricks
BEFORE:msmsgs=msgrocm.dll,OcEntry,msmsgs.inf,hide,7
AFTER:msmsgs=msgrocm.dll,OcEntry,msmsgs.inf,,7
Now when you open Add-Remove Windows Components, you will see a new choice, in this example, "Windows Messenger"
9:29 AM 0
Get Access To CD Roms - Learn latest Computer And Mobile Hacking tricks
If you removed CD Burning software, or for some other mystical reason, can not longer access your CD ROM's,
in most cases following registry keys needs to be deleted:
Locate and delete the UpperFilters and LowerFilters values under the following key in the registry:
HKEY_LOCAL_MACHINE\SYSTEM\CurrentControlSet\Control\Class\{4D36E965-E325-11CE-BFC1-08002BE10318}
9:27 AM 0
How to enable Java Through Your Browser
For Internet Explorer 4.x and Up
1. Click "Tools" --> "Internet Options"
2. Select the Advanced Tab, and scroll down to "Java (Sun)"
3. Check the box next to the Java version
4. Next, select the Security Tab, and select the "Custom Level" button
5. Scroll down to "Scripting of Java applets"
6. Make sure the "Enable" radio button is checked.
7. Click OK to save your preference.
Mozilla 1.x
1. From the menu bar, choose Edit --> Preferences
2. Select the Advanced category
3. Check the box labeled "Enable Java"
4. Click OK to save your preference.
Netscape 7.x
1. From the menu bar, choose Edit --> Preferences
2. Select the Advanced category
3. Check the box labeled "Enable Java"
4. Click OK to save your preference.
Netscape 4.x
1. From the menu bar, choose Edit --> Preferences
2. Select the Advanced category
3. Select "Certificates"
4. Check the box labeled "Enable Java"
5. Check the box labeled "Enable Java Plug-in"
6. Click OK to save your preference.
Other Web Browsers Firefox 0.8 and Up
1. Start Mozilla Firefox browser or restart it if it is already running.
2. Select Tools > Options.
3. Dialog box: Options
4. Click Web Features > Select Enable Java
AOL 3.x and Up
Please refer to our Help page on AOL Issues with Java software. Opera 4.x and Up
1. Opera for Windows does not use Java, but an embedded version already inside the Opera Web browser.
2. Opera for other platforms may supports Java . Please consult your Opera platform documentation.
3. For further information, please review the following Opera Support article:
8:32 PM 0
Pop a Banner On Each Logon - Learn Latest Comuter And Mobile Hacking Tricks
HKEY_LOCAL_MACHINE\SOFTWARE\Microsoft\Windows\CurrentVersion\WinLogon
Now create a new string Value in the right pane named LegalNoticeCaption and enter the value that you want to see in the Menu Bar. Now create yet
another new string value and name it: LegalNoticeText. Modify it and insert the message you want to display each time Windows boots. This can be effectively used to display the company's private policy each time the user logs on to his NT box. It's .reg file would be:
REGEDIT4
[HKEY_LOCAL_MACHINE\SOFTWARE\Microsoft\Windows\CurrentVersion\Winlogon]
"LegalNoticeCaption"="Caption here."
5:38 AM 0
Disable Drives In Your System - Learn Latest Computer And Mobile Hacking tricks
This is yet another trick you can play on your geek friend. To disable the display of local or networked drives when you click My Computer go to :
HKEY_CURRENT_USER\Software\Microsoft\Windows\CurrentVersion\Policies\Explorer
Now in the right pane create a new DWORD item and name it NoDrives. Now modify it's value and set it to 3FFFFFF (Hexadecimal) Now press F5 to refresh. When you click on My Computer, no drives will be shown. To enable display of drives in My Computer, simply delete this DWORD item. It's .reg file is as follows:
REGEDIT4
[HKEY_CURRENT_USER\Software\Microsoft\Windows\CurrentVersion\Policies\Explorer]
"NoDrives"=dword:03ffffff
Take Over the Screen Saver
5:35 AM 0
Exiting The Windows In A Cool And Stylish Way - Learn Latest Computer And Mobile Hacking Tricks
then move the cursor over the OK button and once again (you guessed it) click.This whole process can be shortened by creating shortcuts on the Desktop which will shut down Windows at the click of a button. Start by creating a new shortcut( right click and select New> Shortcut). Then in the command line box, type (without the quotes.)'C:\windows\rundll.exe user.exe,exitwindowsexec'This Shortcut on clicking will restart Windows immediately without any Warning. To create a Shortcut to Restarting Windows, type the following in the Command Line box:'c:\windows\rundll.exe user.exe,exitwindows'This Shortcut on clicking will shut down Windows immediately without any Warning.
5:27 AM 0
Compress Your 1 Gb Data in Just 10 MB- Learn Latest Computer And MObile Hacking Tricks
I tell u which is better & why..If u do it in KGB format it takes 5-6 hours on a 256 mb RAM, to compress 1 GB data/movie in less than 10 MB , but (this is not which i prefer) coz to decompress u take the same time..
So its useless..& u need KGB archiver only only for this format to decompress..But if u do it in ZIP format it takes 6-7 hours on a 256 MB ram, but i tell u its worth coz WINRAR & WINZIP both can decompress it in seconds..
OK now its clear that which format to use & which is better..Now we'll go how to use that software..Run the application>> It asks for which file u wanna compress>> select the file>> after u select>> U get two options in which format u want to compress it>> select ZIP format ( I prefer ) >> and then set compression level to maximum (maximum the compression level , small the size of it will be compressed)>> Just ignore the time given below it coz its just useless....... There is option that u can auto shutdown ur computer after the compression is over..SO u can got school/college/office & keep it to get compressed.. I do the same..
10:40 AM 0
Create A Bootable XP SP integrated CD -
Slipstreaming a Service Pack, is the process to integrate the Service Pack into the installation so that with every new installation the Operating System and Service Pack are installed at the same time.
Slipstreaming is usually done on network shares on corporate systems. But with the advent of CD burners, it does actually make some sense for the home user or small business user to do the same.
Microsoft added the ability to Slipstream a Service Pack to Windows 2000 and Windows XP. It not only has the advantage that when you (re)install your OS, you don't have to apply the Service Pack later, also if you update any Windows component later, you'll be sure that you get the correct installation files if Windows needs any.
Slipstream Windows XP Service Pack 1a:
CODE
http://download.microsoft.com/download/5/4/f/54f8bcf8-bb4d-4613-8ee7-db69d01735ed/xpsp1a_en_x86.exe
Download the (full) "Network Install" of the Service Pack (English version [125 MB]), and save it to a directory (folder) on your hard drive (in my case D:\XP-SP1). Other languages can be downloaded from the Windows XP Web site.
Microsoft recently released Windows XP SP1a. The only difference is that this Service Pack does no longer include Microsoft's dated Java version. If you have already installed Windows XP SP1, there is no reason to install SP1a, but the "older" SP1 (with MS Java) is no longer available for download.
Next copy your Windows XP CD to your hard drive. Just create a folder (I used \XP-CD), and copy all the contents of your Windows XP CD in that folder.
Now create a folder to hold the Service Pack 1a (SP1a) files you are about to extract. I named it \XP-SP1. Next, open a Command Prompt (Start > Run > cmd), and go to the folder where you downloaded SP1a (cd \foldername). Type the command: servicepack filename -x. A small window will appear, and you need to point it to the folder where you want to extract the SP1 files. Click Ok to start extracting the SP1a files.
Once the SP1a files are extracted, change to the update folder of the SP1a files (cd update), and type the following command: update /s:path to WinXP CD files. In my example the command is update /s:D:\XP-CD).
Windows XP Update will do its thing:
When ready, you should get a confirmation. Windows XP Service Pack 1a has now been Slipstreamed into your original Windows XP files.
It is also possible to add the Windows XP Rollup 1 Update. For instructions, please read Adding Windows XP Rollup 1 Hotfix.
Creating a Bootable CD
For this part I used ISO Buster
CODE
http://www.smart-projects.net/isobuster/
and Nero Burning.
Start to extract the boot loader from the original Windows XP CD. Using ISO Buster, select the "folder" Bootable CD, and right-click Microsoft Corporation.img. From the menu choose Extract Microsoft Corporation.img, and extract it to the folder on your hard drive where you have your Windows XP files (D:\XP-CD in my case).
Next, start Nero Burning ROM, and choose CD-ROM (Boot) in the New Compilation window. On the Boot tab, select Image file under Source of boot image data, and browse to the location of the Microsoft Corporation.img file. Also enable Expert Settings, choosing No Emulation, and changing the Number of loaded sectors to 4 (otherwise it won't boot!)
If you have an older version of Nero you won't have the option Do Not Add ";1" ISO file version extention under Relax ISO Restrictions. You won't be able to boot your new CD, so update Nero!
You can configure the Label tab to your liking, I would however recommend that you keep the Volume Label the same as on your original Windows XP CD.
Next press New, and drag & drop the files and folders from your Windows XP hard drive location into Nero.
Next, burn your new CD.
You now have a Bootable, Slipstreamed Windows XP Service Pack 1a CD!
10:43 AM 0
Chat In CMD - Learn Latest Computer And Mobiel Hacking Tricks
If you want personal chat with a friend
you don't need to download any yahoo messenger
All you need is your friends IP address and Command Prompt.
Firstly, open Notepad and enter:
@echo o
:A
Cls
echo MESSENGER
set /p n=User:
set /p m=Message:
net send %n% %m%
Pause
Goto A
Now save this as "Messenger.bat". Open the .bat file and in Command
Prompt you should see:
MESSENGER
User:
After "User" type the IP address of the computer you want to contact.
After this, you should see this:
Message:
Now type in the message you wish to send.Before you press "Enter" it should look like this:
MESSENGER
User:27.196.391.193
Message: Hi
Now all you need to do is press "Enter", and start chatting!
10:36 AM 0
I cannot use my password to get back into Windows XP - Learn Latest Computer And Mobile Hacking Tricks
You have several options to try and get around this problem.
If you have access to another user account with administrator rights, you can use that account to change the password
of the account that is locked out. You can also use the default Administrator account that is built into Windows XP.
First you need to boot the system into Safe Mode.
1.Restart your system.
2.When you see the blue Dell globe or screen, press the ( F8 ) key about 3 times a second.
3.You should get the Windows startup menu. Use the (Up or Down) arrow keys to highlight (SafeMode)
4.Press (Enter) on (Safe Mode), then press (Enter) on (Windows XP).
5.The system should boot to Safe Mode.
Once you are at the Account Log on Screen, click on the icon
for the user account with administrator rights, or click on the icon
for the administrators account.
Note: For Home the Administrator account isn't normally shown & in Safe Mode you have to press Ctrl+Alt+Delete keys twice to show.
For PRO you can do this in normal mode
When the system has booted to the desktop, use the following steps to change the accounts password.
1.Click Start, Control Panel, Administrative Tools.
2.Click Computer Management.
3.Double click Local Users and Groups, double click the folder Users.
4.Right click on the account name that is locked out, and click on Set Password.
5.You may get a warning message about changing the password, simply click proceed.
6.Leave the New Password box blank, also leave the Confirm Password box blank.
7.Click OK, and OK again.
8.Then close all Windows, reboot the system and try to log in.
There are also applications that can recover the password for you.
The following companies provide these applications at a cost.
iOpus® Password Recovery XP here.
LostPassword.com, here.
Asterisk Password Recovery XP v1.89 here.
Windows XP / 2000 / NT Key here.
If the above information does not help in recovering the password, the only option left is to
format the hard drive then reinstall Windows and the system software.
10:23 AM 0
Change The text Of Stat Menu
In order to make the changes, the file explorer.exe located at C:\Windows needs to be edited. Since explorer.exe is a binary file it requires a special editor. For purposes of this article I have used Resource Hacker. Resource HackerTM is a freeware utility to view, modify, rename, add, delete and extract resources in 32bit Windows executables and resource files (*.res). It incorporates an internal resource script compiler and decompiler and works on Microsoft Windows 95/98/ME, Windows NT, Windows 2000 and Windows XP operating systems.
get this from h**p://delphi.icm.edu.pl/ftp/tools/ResHack.zip
The first step is to make a backup copy of the file explorer.exe located at C:\Windows\explorer. Place it in a folder somewhere on your hard drive where it will be safe. Start Resource Hacker and open explorer.exe located at C:\Windows\explorer.exe.
The category we are going to be using is "String Table". Expand it by clicking the plus sign then navigate down to and expand string 37 followed by highlighting 1033. If you are using the Classic Layout rather than the XP Layout, use number 38. The right hand pane will display the stringtable. We’re going to modify item 578, currently showing the word “start” just as it displays on the current Start button.
There is no magic here. Just double click on the word “start” so that it’s highlighted, making sure the quotation marks are not part of the highlight. They need to remain in place, surrounding the new text that you’ll type. Go ahead and type your new entry. In my case I used Click Me!
You’ll notice that after the new text string has been entered the Compile Script button that was grayed out is now active. I won’t get into what’s involved in compiling a script, but suffice it to say it’s going to make this exercise worthwhile. Click Compile Script and then save the altered file using the Save As command on the File Menu. Do not use the Save command – Make sure to use the Save As command and choose a name for the file. Save the newly named file to C:\Windows.
Step 2 – Modify the Registry
!!!make a backup of your registry before making changes!!!
Now that the modified explorer.exe has been created it’s necessary to modify the registry so the file will be recognized when the user logs on to the system. If you don’t know how to access the registry I’m not sure this article is for you, but just in case it’s a temporary memory lapse, go to Start (soon to be something else) Run and type regedit in the Open field. Navigate to:
HKEY_LOCAL_MACHINE\ SOFTWARE\ Microsoft\ Windows NT\ CurrentVersion\ Winlogon
In the right pane, double click the "Shell" entry to open the Edit String dialog box. In Value data: line, enter the name that was used to save the modified explorer.exe file. Click OK.
Close Registry Editor and either log off the system and log back in, or reboot the entire system if that’s your preference. If all went as planned you should see your new Start button with the revised text.[/b]
3:49 AM 0

 Posts
Posts

