
Showing posts with label Registry Tweaks. Show all posts
Showing posts with label Registry Tweaks. Show all posts
How to Hide entries in Registry

Even though this exploit has been around for quite a while now, xp systems are still vulnerable. so as i learned it , i thought i mst share it here with you guys. it's a tactic mainly used by ad- and malware to hide themselves from the humans who hunt them. So here we go...:)1
First.
Navigate to where you want to hide your app and export a registry key. (you could always just create it yourself, but this simplifies it a little) now you need to edit the entry a bit and give your registry key a very long name (in this example, i called it "very...very long" and pointed it to open calculator) remember this is just an example, boost up your imagination .. :P

Second:
save your new creation and you'll have your modified entry. all you need to do now is run it (double click), click yes and you're set!

Third:
to verify that it worked, you can use a third party app (in this case i used CCleaner) and you'll see that though the key doesn't show up in the hive, it does in your 3rd party editor.

how it works:
your out-of-the-box windows xp machine comes fully equipped wit a registry editor. one of the caveats of this editor is that it uses a single byte to store the length of a string (think turbo pascal back in the day) and as such is not equipped to deal with key names longer that 255 characters. (i believe that many years ago, there was a similar issue with limewire, but unlike microsoft, they fixed it). if you want to read the securityfocus article you can find it [here]. and if you think this exploit is new, just look at the date.
this was tested on windows xp with sp3. as always, this should not be used for rootkits or malware, and if you do i cannot accept any responsibility for your actions.
EDIT: this was also tested on windows 7 ultimate and proved to work there too.
Hope u enjoyed the tut. Enjoy hackig, enjoy hackton.
12:47 AM 0
How To Remove And Edit Winodws Saved Passwords

Windows XP does not offer a very easy way to review or remove the saved passwords though. If you follow the steps below though you can access a graphical interface to add, remove or edit the saved passwords on a given system.
1. Click Start and select Run
2. In the Open field type "rundll32.exe keymgr.dll, KRShowKeyMgr"
3. Once the Stored Usernames and Passwords interface opens you can select any of the entries and select Properties to view the existing information
4. To remove a saved password you can select one of the entries and select Remove. A confirmation screen will appear. Click on OK and the account will be removed
5. You can add additional saved passwords as well by clicking on the Add button and entering the appropriate information
6. Repeat the steps above as needed to add, remove or edit saved passwords
7. When you are done using the interface click the Close button
11:13 AM 0
How TO Customize Start Menu Button In Windows 7

Default Start Menu Button

Customized Start Menu Button


Tools That You Need:
1. Resource Hacker2. Custom Start Menu icons (images). It mush be of the size 54×162 with a .bmp extension. which looks something as follows

1st Image - When the button is not in use
2nd Image - When the mouse pointer is over the button
3rd Image - When the button is clicked
I have created a few customized buttons which are ready to use. You can download them from the following link.
Start Menu Buttons Download
1. Take the Ownership of “explorer.exe“ which is located in the Windows Folder (Most likely in C:\Windows).
2. Open the Resource Hacker Tool.
3. Go to File menu and click on Open. Now load the file “explorer.exe” into the Resource Hacker.
4. Expand Bitmap branch in the left pane.
5. Now expand 6801 option, right-click on 1033 and select Replace Resource option.
6. A new window appears. Click on Open file with new bitmap button.
7. Navigate to the customized (.bmp) image, open it and click on Replace button.
8. Repeat steps 4 to 7 above for the options 6805 and 6809 as well.

9. Now click on Save option (File->Save). Resource Hacker will automatically create a backup file called explorer_original.exe so that you can restore it in the future if needed.
10. Log Off and Log On to see the changes in effect.
NOTE: If you are running 64-bit edition of Windows 7, then you need to use Resource Hacker version 3.5.2 beta which is 64-bit compatible. It is available from the same link provided above.
I hope you enjoy this trick. Pass your comments and share your experience.HOpes u enjoy this article, ANy comment or suggestions, Pls do Comment.
Enjoy Hacking, Enjoy Hackton.
9:09 AM 0
How To Password Protect Your Linux Box (OS) With GRUB

GRUB, the Only bootloader for Linux OS, as NTLDR works in windows..
here , the basic idea for Securing the Linux box wiht GRUB is, we implies sum security on GRUB itself..The MOst basic Phase in Loading Of An Operating System.
However , Gettin bypassed with GRUb is also not that much difficult, its as easy as Burning a MATCH STICk, bt guys, i wud tell u that somehow later.
So wt the basic idea is, If you don't want someone booting your machine without permission, you can add a password to your GRUB entries. You can add a password only to specific entries if you wish; this will require a user to enter a password before loading only those boot entries you protect. This can be useful when done on your Recovery Mode entries, which bring up a passwordless root login by default.
To get started, let's first encrypt the password we want to use. Open up a terminal and enter the grub command. This brings up a grub shell. In this shell, enter the md5crypt command. When prompted, type in the password you want on your grub entries. (Don't worry, this won't write anything to your files!) After pressing Enter, you will be given an encrypted password string. Copy the string to your clipboard. Enter quit to exit the grub shell and return to bash.
Now that we have an encrypted password, it's time to add it to grub. Using sudo, open up /boot/grub/menu.lst using your favorite text editor.
To get started, let's first encrypt the password we want to use. Open up a terminal and enter the grub command. This brings up a grub shell. In this shell, enter the md5crypt command. When prompted, type in the password you want on your grub entries. (Don't worry, this won't write anything to your files!) After pressing Enter, you will be given an encrypted password string. Copy the string to your clipboard. Enter quit to exit the grub shell and return to bash.
Code:
GNU GRUB  version 0.95  (640K lower / 3072K upper memory)

 [ Minimal BASH-like line editing is supported.  For the first word, TAB
   lists possible command completions.  Anywhere else TAB lists the possible
   completions of a device/filename. ]

grub> md5crypt

Password: *************
Encrypted: $1$w7Epf0$vX6rxpozznLAVxZGkcFcs.

grub>
Note : if ur version of linux Box does not Encrypts password as such, Then you may have to Copy The encrypted passwrd frm the Shadow Fiel..(If U r having this case, do ask me, n i wud tell u the whole game IN step wise step manner)
After the "initrd" line for each entry you want to password protect, start a new line beginning with password --md5 and paste in your newly-encrypted password. Using the above example password on the i386 recovery entry, this:
Becomes this:
You must add such a line after every entry you want to password protect. As I mentioned earlier, I password protected my recovery mode entries out of sheer paranoia. 
Save the file, and reboot. (The first time you try this, I suggest only doing it to one entry so you can test it to make sure it works, and you can still use another entry to boot your machine in case something went wrong.)
For a bit of added peace of mind, you can prevent everyone except root from reading /boot/grub/menu.lst by doing:
______________________________________________________________________________After the "initrd" line for each entry you want to password protect, start a new line beginning with password --md5 and paste in your newly-encrypted password. Using the above example password on the i386 recovery entry, this:
Code:
title Ubuntu, kernel 2.6.8.1-2-386 (recovery mode)
        root (hd1,2)
        kernel /boot/vmlinuz-2.6.8.1-2-386 root=/dev/hdb3 ro single
        initrd /boot/initrd.img-2.6.8.1-2-386
Becomes this:
Code:
title Ubuntu, kernel 2.6.8.1-2-386 (recovery mode)
        root (hd1,2)
        kernel /boot/vmlinuz-2.6.8.1-2-386 root=/dev/hdb3 ro single
        initrd /boot/initrd.img-2.6.8.1-2-386
password --md5 $1$w7Epf0$vX6rxpozznLAVxZGkcFcs.Save the file, and reboot. (The first time you try this, I suggest only doing it to one entry so you can test it to make sure it works, and you can still use another entry to boot your machine in case something went wrong.)
For a bit of added peace of mind, you can prevent everyone except root from reading /boot/grub/menu.lst by doing:
Code:
sudo chmod 600 /boot/grub/menu.lst
Thats it u r finished with it.
Hopes u enjoy this., have fun. Enjoy Hacking.. Enjoy Hackton
8:14 PM 0
How To Speed Up My Shutdown Speed in Win XP :Learn Latest Computer And Mobile Hacking Tricks
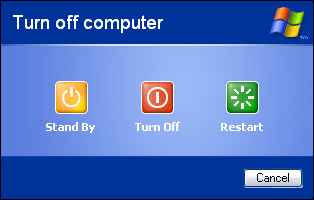
It's not only startup times that you'd like to speed up; you can also make sure that your system shuts down faster. If shutting down XP takes what seems to be an inordinate amount of time, here are a couple of steps you can take to speed up the shutdown process:
Don't have XP clear your paging file at shutdown
For security reasons, you can have XP clear your paging file (pagefile.sys) of its contents whenever you shut down. Your paging file is used to store temporary files and data, but when your system shuts down, information stays in the file. Some people prefer to have the paging file cleared at shutdown, because sensitive information such as unencrypted passwords sometimes ends up in the file.
However, clearing the paging file can slow shutdown times significantly, so if extreme security isn't a high priority, you might not want to clear it. To shut down XP without clearing your paging file, run the Registry Editor and go to:
HKEY_LOCAL_MACHINE\SYSTEM\CurrentControlSet\Control\Session Manager\Memory Management
Change the value of ClearPageFileAtShutdown to 0. Close the Registry and restart your computer. Whenever you turn off XP from now on, the paging file won't be cleared, and you should be able to shut down more quickly.
Turn off unnecessary services
Services take time to shut down, so the fewer you run, the faster you can shut down.
11:47 PM 0
How To Control User Logins by Hacking the Registry
Make better use of the XP login screen.
If there is more than one user account on your system, or if you've set up XP to require logins, you'll have to log in to XP before you can begin to use it. But you needn't stay with the default XP login rules; you can use a single Registry key to customize how you log in. For example, you can display custom text before login, and you can remind anyone with an account on the PC to change their password a certain number of days prior to the password's expiration.
To control logon options, run the Registry Editor and go to the HKEY_LOCAL_MACHINE\SOFTWARE\Microsoft\Windows NT\CurrentVersion\Winlogon subkey, which contains a variety of logon settings (as well as some settings not having to do directly with logons). Following are the most important values you can edit to customize logons.
DontDisplayLastUserName
This setting lets you control how the system logon dialog box is used. If this String value is present and set to 1, all users will have to enter both their username and password in order to log on. If the value is 0, the name of the last user to log on will be displayed in the system logon dialog box.
DefaultUserName
This String value contains the name of the last user who logged on. It will be displayed only if the DontDisplayLastUserName value is not present or is set to 0.
LegalNoticeCaption
This String value, used in concert with the LegalNoticeText value, displays a dialog box prior to logon that contains any text you want to display. (The text doesn't have to be a legal notice, but this value is often used for that purpose.) The box has a title and text. The LegalNoticeCaption value will be the dialog box's title.
LegalNoticeText
This String value, used in concert with LegalNoticeCaption, contains the text that you want to be displayed inside a dialog box displayed prior to logon.
PasswordExpiryWarning
This DWORD value lets you display a warning message to users a certain number of days before their passwords are set to expire. It lets you determine how many days ahead of time the warning should be issued. To edit the value, click on the decimal button and enter the number of days.
ShutdownWithoutLogon
This String value enables or disables a button on the XP logon dialog box that lets the system be shutdown. A value of 1 enables the button (so that it is shown); a value of 0 disables the button (so that it is not shown).
Shell
This String value really doesn't have to do with logons, but it's one you should know about. It determines the shell—the user interface—that will be used by XP. The default is Explorer.exe, but it can be another shell as well—for example, the Program Manager from older Windows versions. Type in the name of the program—for example, Progman.exe for Program Manager, or Taskman.exe for the Task Manager.
AutoRestartShell
This DWORD value doesn't have to do with logons either, but it's another good one to know. It sets whether to automatically restart the Windows shell if the shell crashes. A value of 1 automatically restarts the shell. A value of 0 tells XP not to restart the shell, forcing you to log off and then back on again to restart it.
If there is more than one user account on your system, or if you've set up XP to require logins, you'll have to log in to XP before you can begin to use it. But you needn't stay with the default XP login rules; you can use a single Registry key to customize how you log in. For example, you can display custom text before login, and you can remind anyone with an account on the PC to change their password a certain number of days prior to the password's expiration.
To control logon options, run the Registry Editor and go to the HKEY_LOCAL_MACHINE\SOFTWARE\Microsoft\Windows NT\CurrentVersion\Winlogon subkey, which contains a variety of logon settings (as well as some settings not having to do directly with logons). Following are the most important values you can edit to customize logons.
DontDisplayLastUserName
This setting lets you control how the system logon dialog box is used. If this String value is present and set to 1, all users will have to enter both their username and password in order to log on. If the value is 0, the name of the last user to log on will be displayed in the system logon dialog box.
DefaultUserName
This String value contains the name of the last user who logged on. It will be displayed only if the DontDisplayLastUserName value is not present or is set to 0.
LegalNoticeCaption
This String value, used in concert with the LegalNoticeText value, displays a dialog box prior to logon that contains any text you want to display. (The text doesn't have to be a legal notice, but this value is often used for that purpose.) The box has a title and text. The LegalNoticeCaption value will be the dialog box's title.
LegalNoticeText
This String value, used in concert with LegalNoticeCaption, contains the text that you want to be displayed inside a dialog box displayed prior to logon.
PasswordExpiryWarning
This DWORD value lets you display a warning message to users a certain number of days before their passwords are set to expire. It lets you determine how many days ahead of time the warning should be issued. To edit the value, click on the decimal button and enter the number of days.
ShutdownWithoutLogon
This String value enables or disables a button on the XP logon dialog box that lets the system be shutdown. A value of 1 enables the button (so that it is shown); a value of 0 disables the button (so that it is not shown).
Shell
This String value really doesn't have to do with logons, but it's one you should know about. It determines the shell—the user interface—that will be used by XP. The default is Explorer.exe, but it can be another shell as well—for example, the Program Manager from older Windows versions. Type in the name of the program—for example, Progman.exe for Program Manager, or Taskman.exe for the Task Manager.
AutoRestartShell
This DWORD value doesn't have to do with logons either, but it's another good one to know. It sets whether to automatically restart the Windows shell if the shell crashes. A value of 1 automatically restarts the shell. A value of 0 tells XP not to restart the shell, forcing you to log off and then back on again to restart it.
8:48 AM 0
Implement Best Password policy For Windows Authentication
By default Windows accepts both short and long passwords as the Windows login password.
Some users use extremely short passwords, which can easily be brute forced. So in order to set the minimum number
of characters or the minimum length of the password, simply follow the following registry trick-:
1. Launch the Windows Registry Editor i.e. c:\windows\regedit.exe
2. Scroll down to the following registry key:
HKEY_LOCAL_MACHINE\SOFTWARE\Microsoft\Windows\CurrentVersion\Policies\Network
3. Click on Edit > New DWORD Value.
4. Name this new DWORD value as MinPwdLen and in the data field, enter the minimum number of characters
the password has to be of. One thing to note here is that this value is in Hexadecimal.
5. Now, Press F5 and your system just became a tiny bit securer but certainly not unhackable.
Some users use extremely short passwords, which can easily be brute forced. So in order to set the minimum number
of characters or the minimum length of the password, simply follow the following registry trick-:
1. Launch the Windows Registry Editor i.e. c:\windows\regedit.exe
2. Scroll down to the following registry key:
HKEY_LOCAL_MACHINE\SOFTWARE\Microsoft\Windows\CurrentVersion\Policies\Network
3. Click on Edit > New DWORD Value.
4. Name this new DWORD value as MinPwdLen and in the data field, enter the minimum number of characters
the password has to be of. One thing to note here is that this value is in Hexadecimal.
5. Now, Press F5 and your system just became a tiny bit securer but certainly not unhackable.
11:29 PM 0
Solution For Error - Cant Access VPN
This one is avery common problem wenevr v had conigured a VPN netwrk over a city or watever range.
V cant ping while each n everything seems to be in all rite..
So at that moment , jst go fr a look on this trick..its simply a tweak that is simply gonna be giving u a strike on how to solve it...
Herev go...
1. Make sure the the Routing and Remote Access service on the VPN server is running. To do this go to the Properties of My Computer>Manager>Services.
2. Make sure remote access on the VPN server is enabled. To enable the remote access server, Open Routing and Remote Access, right-click the server name for which you want to enable remote access, and then click Properties. On the General tab, select the Remote access server check box.
3. Make sure PPTP or L2TP ports, or both are enabled for inbound remote access requests. For consultants, refer to case RL040503
V cant ping while each n everything seems to be in all rite..
So at that moment , jst go fr a look on this trick..its simply a tweak that is simply gonna be giving u a strike on how to solve it...
Herev go...
1. Make sure the the Routing and Remote Access service on the VPN server is running. To do this go to the Properties of My Computer>Manager>Services.
2. Make sure remote access on the VPN server is enabled. To enable the remote access server, Open Routing and Remote Access, right-click the server name for which you want to enable remote access, and then click Properties. On the General tab, select the Remote access server check box.
3. Make sure PPTP or L2TP ports, or both are enabled for inbound remote access requests. For consultants, refer to case RL040503
9:23 PM 0
Remove Unwanted Softwares and programs forcefully - Learn latest Computer And Mobile Hacking tricks
If you want to remove some additional programs that are installed with windows but are not initially visible in Add / Remove, edit a file called "C:\WINDOWS\INF\SYSOC.INF". In there you will find a listing of programs, and you will note that some programs have the word 'hide' at the end. Simply remove the word 'hide' but leave the extra comma:
BEFORE:msmsgs=msgrocm.dll,OcEntry,msmsgs.inf,hide,7
AFTER:msmsgs=msgrocm.dll,OcEntry,msmsgs.inf,,7
Now when you open Add-Remove Windows Components, you will see a new choice, in this example, "Windows Messenger"
BEFORE:msmsgs=msgrocm.dll,OcEntry,msmsgs.inf,hide,7
AFTER:msmsgs=msgrocm.dll,OcEntry,msmsgs.inf,,7
Now when you open Add-Remove Windows Components, you will see a new choice, in this example, "Windows Messenger"
9:29 AM 0
Stop Users From Wtriting to USb - Learn Latest Computer And Mobile hacking Tricks
If you have windows XP with SP2, then you can disable the writing option to USB drives. This trick is very useful if you have virus in your computer and want to copy files from a USB Drive but don’t want to transfer virus to the USB. Follow the given steps to disable the USB writing option:
To edit the computer registry, first you should log onto your computer with administrative rights.
First click on Start button and type “Regedit” in Run option.
Here locate the location to:
HKEY_LOCAL_MACHINE\SYSTEM\CurrentControlSet\Control
Here in right side panel, click right to create a key with the name “StorageDevicePolicies”.
Now in left side panel, select “StorageDevicePolicies” key, again right click to create new DWORD value then label it “WriteProtect”. Set its value to “1″. But again to enable writing, set its values to “0″.
Now close the registry editor and restart your computer after any changes to go into effect.
To edit the computer registry, first you should log onto your computer with administrative rights.
First click on Start button and type “Regedit” in Run option.
Here locate the location to:
HKEY_LOCAL_MACHINE\SYSTEM\CurrentControlSet\Control
Here in right side panel, click right to create a key with the name “StorageDevicePolicies”.
Now in left side panel, select “StorageDevicePolicies” key, again right click to create new DWORD value then label it “WriteProtect”. Set its value to “1″. But again to enable writing, set its values to “0″.
Now close the registry editor and restart your computer after any changes to go into effect.
11:43 PM 0
Pop a Banner On Each Logon - Learn Latest Comuter And Mobile Hacking Tricks
To pop a banner which can contain any message you want to display just before a user is going to log on, go to the key:
HKEY_LOCAL_MACHINE\SOFTWARE\Microsoft\Windows\CurrentVersion\WinLogon
Now create a new string Value in the right pane named LegalNoticeCaption and enter the value that you want to see in the Menu Bar. Now create yet
another new string value and name it: LegalNoticeText. Modify it and insert the message you want to display each time Windows boots. This can be effectively used to display the company's private policy each time the user logs on to his NT box. It's .reg file would be:
REGEDIT4
[HKEY_LOCAL_MACHINE\SOFTWARE\Microsoft\Windows\CurrentVersion\Winlogon]
"LegalNoticeCaption"="Caption here."
HKEY_LOCAL_MACHINE\SOFTWARE\Microsoft\Windows\CurrentVersion\WinLogon
Now create a new string Value in the right pane named LegalNoticeCaption and enter the value that you want to see in the Menu Bar. Now create yet
another new string value and name it: LegalNoticeText. Modify it and insert the message you want to display each time Windows boots. This can be effectively used to display the company's private policy each time the user logs on to his NT box. It's .reg file would be:
REGEDIT4
[HKEY_LOCAL_MACHINE\SOFTWARE\Microsoft\Windows\CurrentVersion\Winlogon]
"LegalNoticeCaption"="Caption here."
5:38 AM 0
Disable Drives In Your System - Learn Latest Computer And Mobile Hacking tricks
This is yet another trick you can play on your geek friend. To disable the display of local or networked drives when you click My Computer go to :
HKEY_CURRENT_USER\Software\Microsoft\Windows\CurrentVersion\Policies\Explorer
Now in the right pane create a new DWORD item and name it NoDrives. Now modify it's value and set it to 3FFFFFF (Hexadecimal) Now press F5 to refresh. When you click on My Computer, no drives will be shown. To enable display of drives in My Computer, simply delete this DWORD item. It's .reg file is as follows:
REGEDIT4
[HKEY_CURRENT_USER\Software\Microsoft\Windows\CurrentVersion\Policies\Explorer]
"NoDrives"=dword:03ffffff
Take Over the Screen Saver
5:35 AM 0
Disable Highlighting of New Programs In Widows Vista : Learn Latest Computer And Mobile Hacking Tricks
1) Start the Windows Registry Editor by typing “regedit” in the Start -> Search box and press Enter . Click on continue if you see user Account Control dialogue box.
2) In the Windows Registry Editor, locate the key called:
HKEY_CURRENT_USER\Software\Microsoft\Windows\CurrentVersion\Explorer\Advanced
This can be done by clicking on the + sign near each item as mentioned above and select Advanced key
3) In the right-hand pane, look for the value called “Start_NotifyNewApps”.
4) If the value does not exist, then right click on the right pane and select New and then click DWORD (32-bit) Value. Then type “Start_NotifyNewApps” (without the quote) as the name of the new DWORD Value, and press Enter.
5) Right-click the “Start_NotifyNewApps”, and in the popup menu select Modify…
6) Change the Value data to a zero (0), and click OK.
7) Now close the Registry Editor.
After rebooting, Vista will no longer highlight newly installed programs in the Start menu. Be aware that this is a user level setting, so if you want to disable highlighting for another user, log in as the other user and repeat these steps.
If you want to revert back to the original setting, use the same steps, but change the value to one (1) instead of zero (0).
12:17 AM 0
Speed up your browsing of Windows 2000 & XP machines - Learn Latest Computer And MObile hacking Tricks
Here's a great tip to speed up your browsing of Windows XP machines. It’s actually a fix to a bug installed as default in
Windows 2000 that scans shared files for Scheduled Tasks. And it turns out that you can experience a delay as long
as 30 seconds when you try to view shared files across a network. When you view a file on a remote computer your
computer uses extra time to search the remote computer for any Scheduled Tasks. Even though the fix is originally
intended for only those affected, Windows 2000 users will experience that the actual browsing speed of both the
Internet & Windows Explorers improve significantly after applying it since it doesn't search for Scheduled Tasks
anymore.
Here's how:
Click on you start button, click on run and open up the Registry by typing in the word ‘regedit’ and hit enter.
Pls note that the registry holds all the links that make your programs work. Changing the incorrect key can lead to your
computer not functioning correctly. You may want to export the exact branch so that you can restore the key if
necessary. You can export the key by right-clicking on it and selecting export.
Once the registry has opened locate the following entry:
HKEY_LOCAL_MACHINE/Software/Microsoft/Windows/Current Version/Explorer/RemoteComputer/NameSpace
Under that branch, select the key:
{D6277990-4C6A-11CF-8D87-00AA0060F5BF}
And delete it.
This key instructs Windows to search for Scheduled Tasks.
This fix is so effective that it doesn't require a reboot and you can almost immediately determine yourself how much it
speeds up your browsing processes.
Windows 2000 that scans shared files for Scheduled Tasks. And it turns out that you can experience a delay as long
as 30 seconds when you try to view shared files across a network. When you view a file on a remote computer your
computer uses extra time to search the remote computer for any Scheduled Tasks. Even though the fix is originally
intended for only those affected, Windows 2000 users will experience that the actual browsing speed of both the
Internet & Windows Explorers improve significantly after applying it since it doesn't search for Scheduled Tasks
anymore.
Here's how:
Click on you start button, click on run and open up the Registry by typing in the word ‘regedit’ and hit enter.
Pls note that the registry holds all the links that make your programs work. Changing the incorrect key can lead to your
computer not functioning correctly. You may want to export the exact branch so that you can restore the key if
necessary. You can export the key by right-clicking on it and selecting export.
Once the registry has opened locate the following entry:
HKEY_LOCAL_MACHINE/Software/Microsoft/Windows/Current Version/Explorer/RemoteComputer/NameSpace
Under that branch, select the key:
{D6277990-4C6A-11CF-8D87-00AA0060F5BF}
And delete it.
This key instructs Windows to search for Scheduled Tasks.
This fix is so effective that it doesn't require a reboot and you can almost immediately determine yourself how much it
speeds up your browsing processes.
7:11 PM 0
Hide a Folder Without Any Software - Learn Latest Computer And MObile hacking Tricks
This one is really cool and pretty useful too...
Its really easy...
just follow these steps:
1.Create a new folder somewhere on your hard drive.
2.When you name it hold down "Alt" and press "0160" this will create and invisible space so it will apper as if it has no name.
3.right click it and select "Properties" select the tab "coustimize" and select "change icon" scroll along and you should a few blanc spaces click on any one and click ok and save it.
4.when you have saved the settings the folder will be invisible to hide all your personal files.
try this....i dont think that u'll find any problem doing this...if u still find any probs..just leave a comment.
9:48 PM 0
How To Change The Name Of Start Menu- Learn Latest Computer And MObile hacking Tricks
1. Run Resource Hacker, and open \windows\explorer.exe
2. Click String Table > 37 > 1033 (XP-style button)
3. Replace "start" with whatever you want ("hello", in the picture above)
4. Click the Compile Script button. Repeat steps 3 and 4 for String table > 38 > 1033 (Classic-style button)
5. Save the file (File>Save). Hit Cancel then Yes when Windows File Protection pops up.
Note: If an error message pops up when saving the file, kill explorer.exe (Clt-Alt-Del > Processes > explorer.exe > End Process > File > New Task), repeat step 5 (save the file in Resource Hacker), and restart explorer.exe (Clt-Alt-Del > Processes > explorer.exe > End Process > File > New Task > explorer > OK).
Changing the icon of the Start Menu button :
1. Click Bitmap > 143 > 1033
2. Click Action > Replace bitmap > Open file with new bitmap (the new picture must be 25x20, and have 16 million colors).
3. Select a picture file, click Replace, then save (File>Save) your work. Hit Cancel then Yes when Windows File Protection pops up.
4. Close Resource Hacker If you do not want to reboot to see your new button, kill then restart explorer.exe (Clt-Alt-Del > Processes > explorer.exe > End Process > File > New Task > explorer > OK)
2. Click String Table > 37 > 1033 (XP-style button)
3. Replace "start" with whatever you want ("hello", in the picture above)
4. Click the Compile Script button. Repeat steps 3 and 4 for String table > 38 > 1033 (Classic-style button)
5. Save the file (File>Save). Hit Cancel then Yes when Windows File Protection pops up.
Note: If an error message pops up when saving the file, kill explorer.exe (Clt-Alt-Del > Processes > explorer.exe > End Process > File > New Task), repeat step 5 (save the file in Resource Hacker), and restart explorer.exe (Clt-Alt-Del > Processes > explorer.exe > End Process > File > New Task > explorer > OK).
Changing the icon of the Start Menu button :
1. Click Bitmap > 143 > 1033
2. Click Action > Replace bitmap > Open file with new bitmap (the new picture must be 25x20, and have 16 million colors).
3. Select a picture file, click Replace, then save (File>Save) your work. Hit Cancel then Yes when Windows File Protection pops up.
4. Close Resource Hacker If you do not want to reboot to see your new button, kill then restart explorer.exe (Clt-Alt-Del > Processes > explorer.exe > End Process > File > New Task > explorer > OK)
9:44 PM 0
Make Your Windows Menus Load faster- Learn Latest Computer And MObile hacking Tricks
1.Go to Start then Run
2.Type 'Regedit' then click 'Ok'
3.Find "HKEY_CURRENT_USER\Control Panel\Desktop\"
4.Select "MenuShowDelay"
5.Right click and select "Modify'
6.Reduce the number to around "100"
7.This is the delay time before a menu is opened.
Note-----You can set it to "0" but it can make windows really hard to use as menus will open if you just look at them - well move your mouse over them anyway.
I prefer to use between 50-150 depending on my mood.
2.Type 'Regedit' then click 'Ok'
3.Find "HKEY_CURRENT_USER\Control Panel\Desktop\"
4.Select "MenuShowDelay"
5.Right click and select "Modify'
6.Reduce the number to around "100"
7.This is the delay time before a menu is opened.
Note-----You can set it to "0" but it can make windows really hard to use as menus will open if you just look at them - well move your mouse over them anyway.
I prefer to use between 50-150 depending on my mood.
1:11 AM 0
Administrator Account Not Coming On the Welcome Screen- Learn Latest Computer And MObile hacking Tricks
If Your Administrator Account is not coming on your welcome screen, Than you dont have to do much.
What you have to do is simply follow the trick.
1.Start the Registry Editor Go to:
HKEY_LOCAL_MACHINE \ SOFTWARE \ Microsoft \ Windows NT \ CurrentVersion \ Winlogon \
SpecialAccounts \ UserList \
2.Right-click an empty space in the right pane and select New > DWORD Value Name the new value Administrator.
3.Double-click this new value, and enter 1 as it's Value data.
4.Close the registry editor and restart.
What you have to do is simply follow the trick.
1.Start the Registry Editor Go to:
HKEY_LOCAL_MACHINE \ SOFTWARE \ Microsoft \ Windows NT \ CurrentVersion \ Winlogon \
SpecialAccounts \ UserList \
2.Right-click an empty space in the right pane and select New > DWORD Value Name the new value Administrator.
3.Double-click this new value, and enter 1 as it's Value data.
4.Close the registry editor and restart.
9:49 PM 0
Subscribe to:
Posts (Atom)

 Posts
Posts

